How to Add Google Sign-In to a Fusabase Web App
This guide shows you how to add Google sign-in to a web app using the Fusabase JavaScript SDK.
This blog only covers Google sign-in on the web. For GitHub sign-in on the web, see How to Add GitHub Sign-In to a Fusabase Web App.
If you want some hands-on time with Google sign-in without setting up the environment yourself, try the Fusabase RecipeShare LiveLab. Google sign-in is Lab 8.
What you need before you begin
- A Fusabase project
- A Google account that can create or use a Google Cloud project.
How Google sign-in works in a Fusabase web app
The browser starts the flow with signInWithPopup(). Fusabase sends the user to Google, receives Google's callback, and returns the authenticated user to the web app.
╔═ Google sign-in flow ════════════════════════════════════════════╗
║                                                                  ║░
║   Browser                Fusabase                 Google         ║░
║      │                      │                       │            ║░
║      │  signInWithPopup()   │                       │            ║░
║      ├─────────────────────>│                       │            ║░
║      │                      │      authorize        │            ║░
║      │                      ├──────────────────────>│            ║░
║      │                      │      /callback        │            ║░
║      │                      │<──────────────────────┤            ║░
║      │    signed-in user    │                       │            ║░
║      │<─────────────────────┤                       │            ║░
║      │                      │                       │            ║░
║                                                                  ║░
╚══════════════════════════════════════════════════════════════════╝░
 ░░░░░░░░░░░░░░░░░░░░░░░░░░░░░░░░░░░░░░░░░░░░░░░░░░░░░░░░░░░░░░░░░░░░
The Google client secret stays in the Fusabase console.
Step 1: Copy the redirect URI from Fusabase
Fusabase creates the redirect URI that you need to add to Google Cloud. Copy it before creating the Google OAuth client.
Open your project in the Fusabase console. Go to Authentication, open Social login, and find Google.
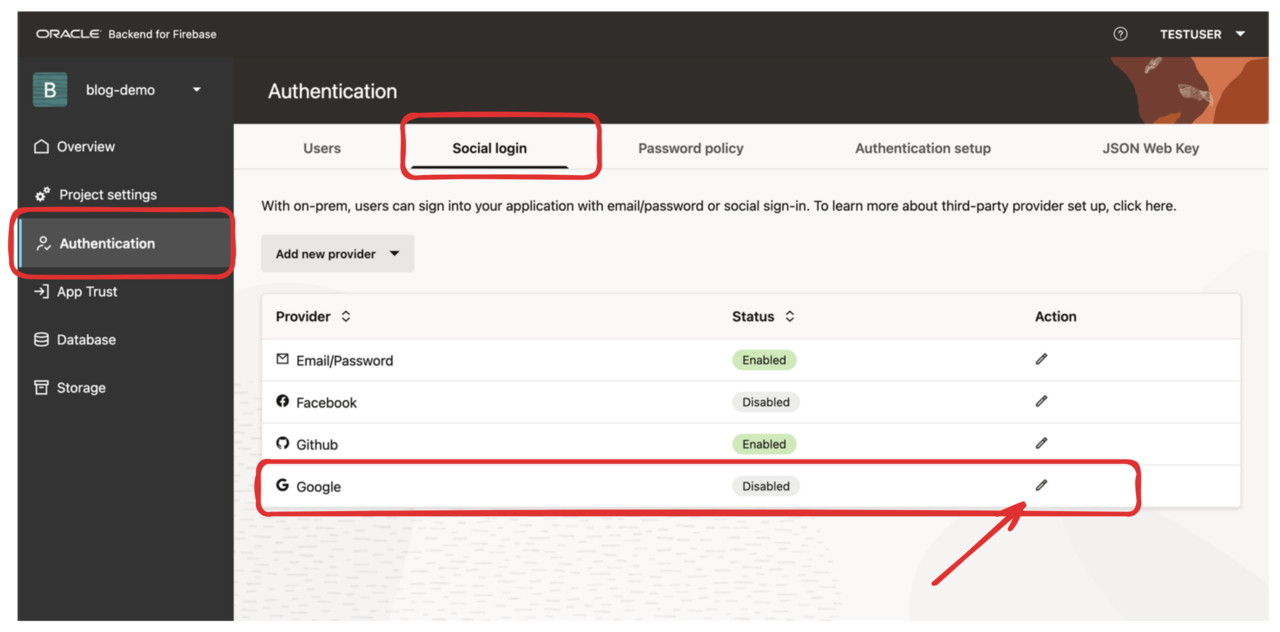
Turn on Enable, then select Copy URI. Keep the provider panel open, or paste the URI somewhere while you set up Google Cloud.
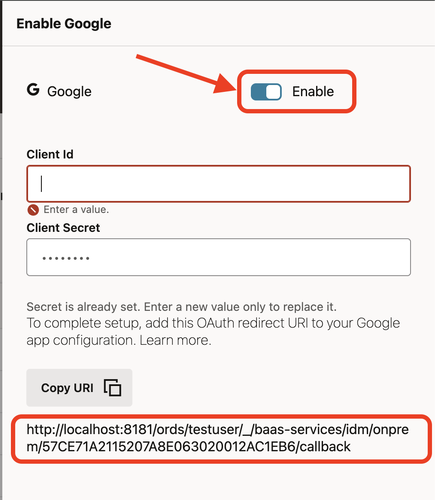
In Step 2, you will paste this value into Google Cloud under Authorized redirect URIs. Copy the complete URI, including the /callback path.
Step 2: Set up the Google OAuth consent screen and create a web OAuth client in Google Cloud
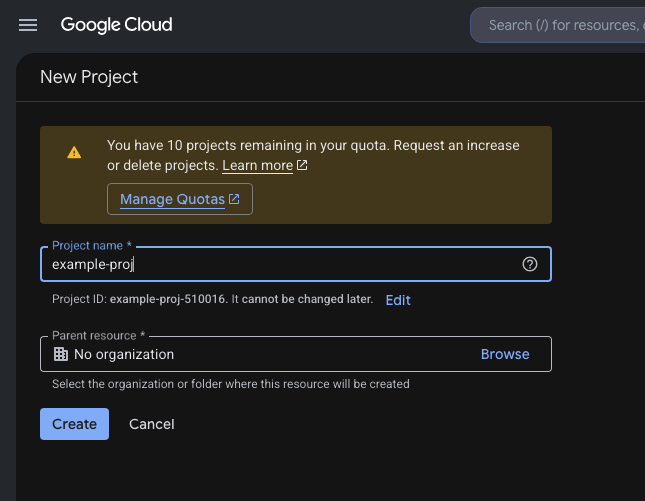
Open the Google Cloud console.
Create a project or select an existing one in the Google Cloud console.
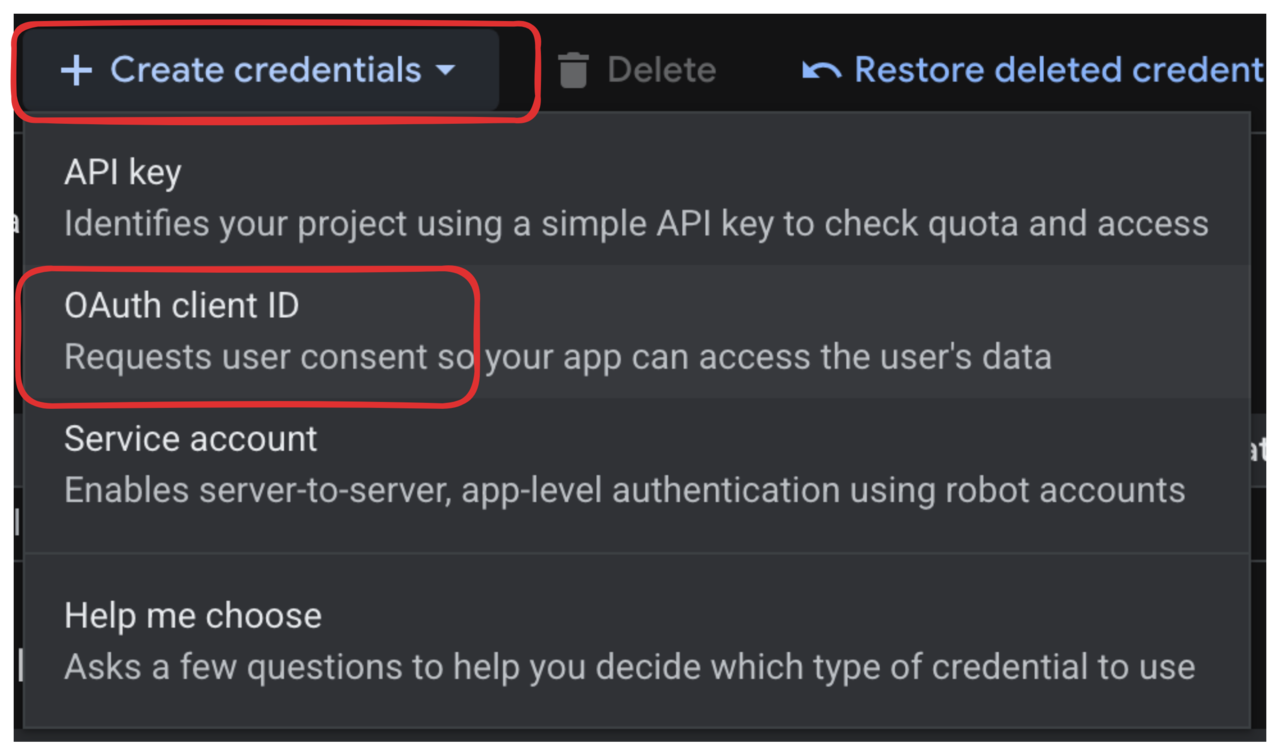
In Google Cloud, open APIs & Services, then Credentials. Select Create credentials and OAuth client ID.
If this is a new project, Google may ask you to configure the OAuth consent screen before you can create the client ID.

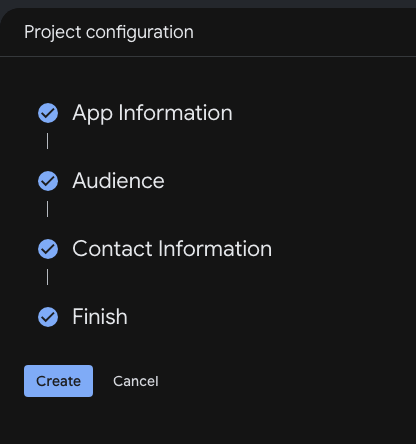
Select Configure consent screen. Follow the steps for App Information, Audience, and Contact Information, then select Create.
Choose Web application as the application type and give the client a name such as RecipeShare local.
Under Authorized redirect URIs, add the URI copied from Fusabase. This is not the URL of your sign-in page. It is the Fusabase callback URL from the console.
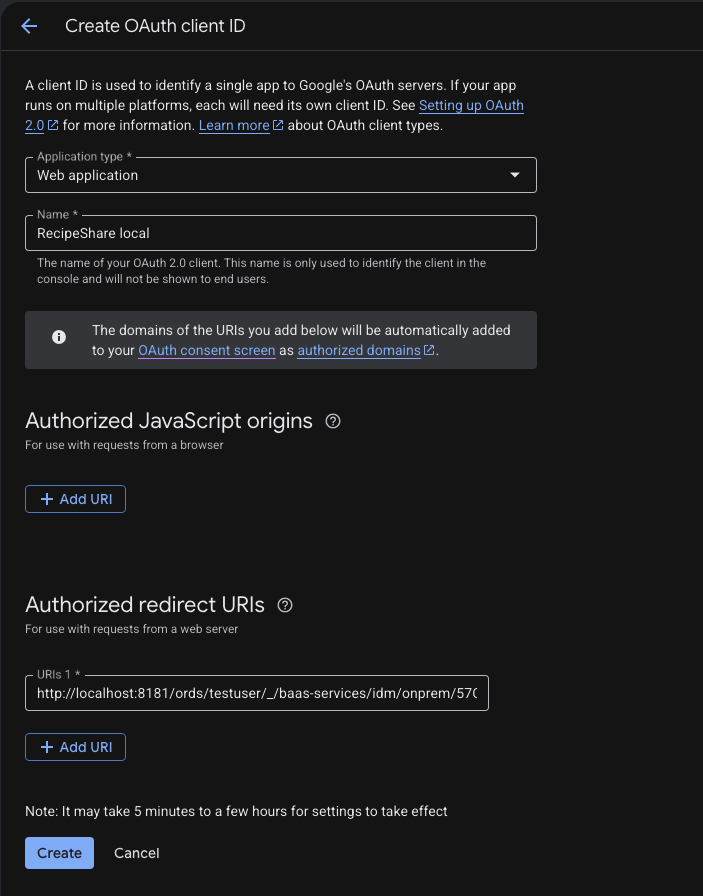
Click Create, then copy the generated Client ID and Client secret. Google only shows the full client secret when it creates the client, so copy it before closing the screen.
Step 3: Connect the Google client to Fusabase
Go back to the Fusabase console in Authentication and Social login.
Paste the Google Client ID and Client secret, confirm that Enable is on, and select Save.
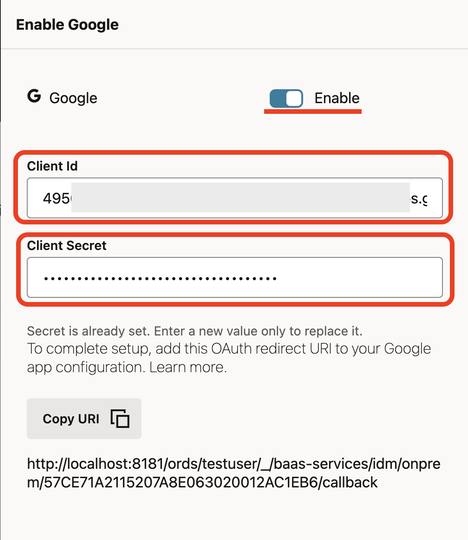
Google sign-in is now enabled for the Fusabase project. The rest of this blog is an example of adding a button to a web app.
Step 4: Add a Continue with Google button
Now add a Continue with Google button to the web app's sign-in form. We will use its ID to attach the Google sign-in listener in the next step.
Add it alongside the email and password fields:
<button
  id="continueWithGoogleButton"
  class="btn btn-outline"
  type="button"
>
  Continue with Google
</button>
The CSS classes are only examples. Keep the button ID consistent with the JavaScript in the next step.
Step 5: Call GoogleAuthProvider and test the sign-in
Import GoogleAuthProvider and signInWithPopup from fusabase/auth:
import {
  GoogleAuthProvider,
  signInWithPopup
} from "fusabase/auth";
Attach the popup flow to the button:
const continueWithGoogleButton = document.querySelector(
  "#continueWithGoogleButton"
);

continueWithGoogleButton.addEventListener("click", async () => {
  await signInWithPopup(auth, new GoogleAuthProvider());
});
This assumes auth is the existing Auth instance returned by getAuth(app). If the app already uses onAuthStateChanged(), that listener receives the signed-in user after the popup closes.
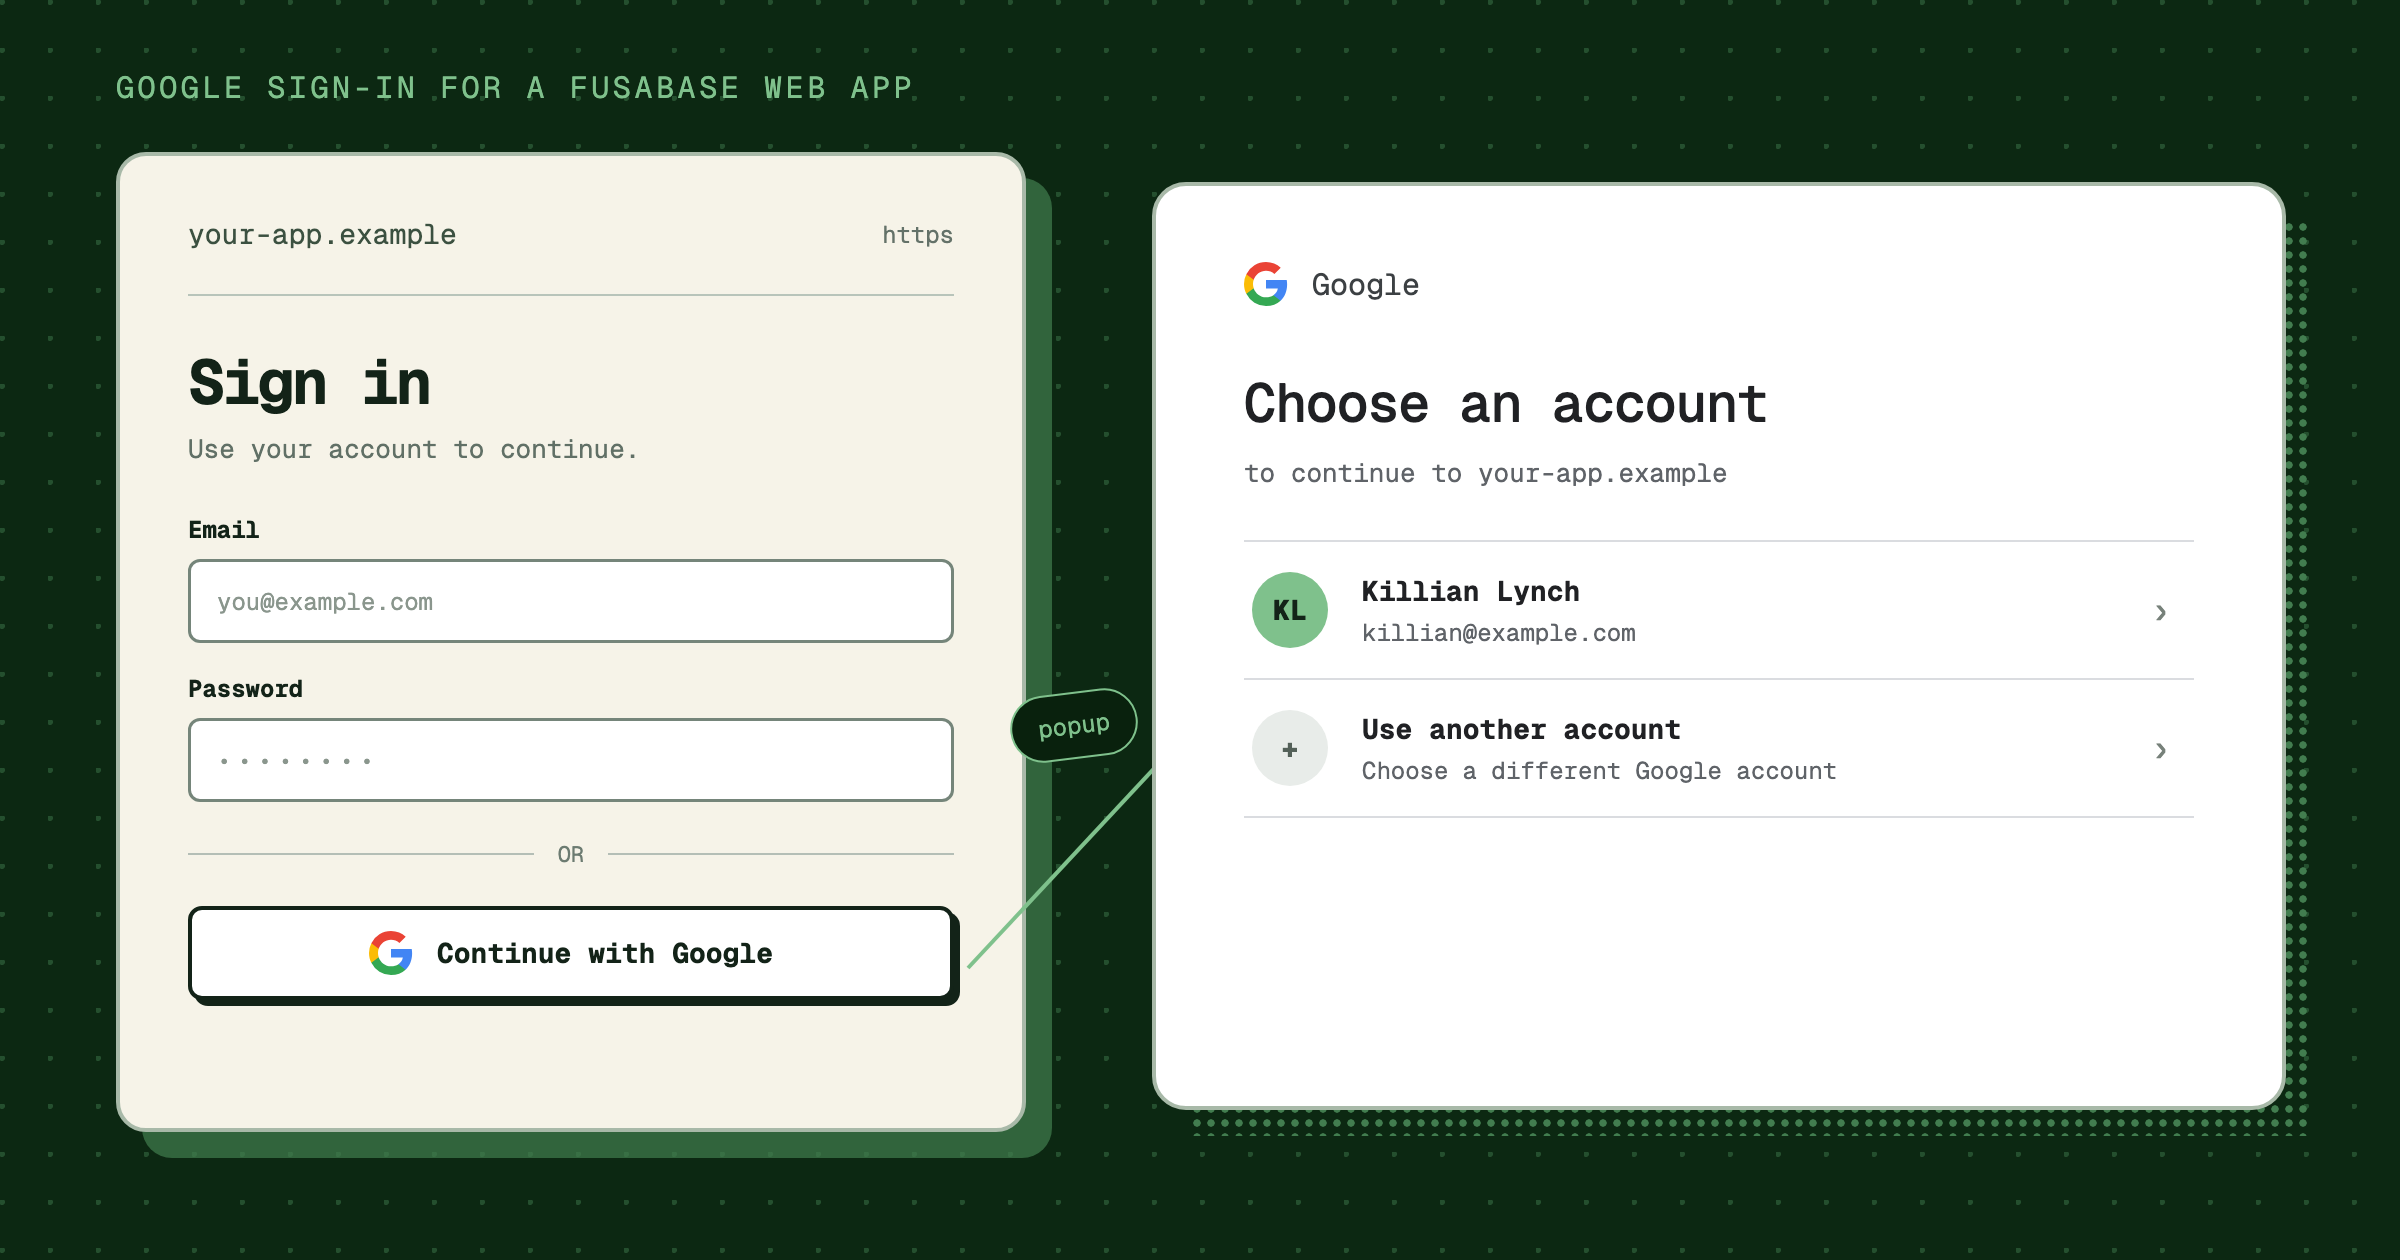
Refresh the app and select Continue with Google. Choose an account in the popup and approve the sign-in request. The popup should close and the app should receive the authenticated user.
Finally, open Authentication in the Fusabase console. The user list should now contain the Google account with the Google provider icon.
Troubleshooting Google sign-in
Google reports redirect_uri_mismatch
Compare the Authorized redirect URI on the Google OAuth client with the URI shown by Fusabase. The scheme, hostname, port, path, case, and trailing slash must match exactly.
The callback belongs to Fusabase. Do not replace it with the web app's homepage or sign-in URL.
Google says the app is restricted to test users
Open the app's Audience configuration in Google Cloud. Add the account as a test user, or sign in with an account inside the configured Google Workspace organization.
For a public production app, review Google's publishing and verification requirements before changing the audience.
Google reports org_internal
The OAuth app is configured for an internal Google Workspace audience, but the selected account is outside that organization. Use an account from the organization or change the audience configuration.
The popup closes without signing in
Allow popups for the web app's origin and try again. Also confirm that the Google provider is enabled and both credentials were saved in Fusabase.
The email already belongs to another provider
Fusabase does not automatically link separate provider accounts that use the same email. For a quick test, use another Google account or remove the conflicting test user before retrying.
That's all
Your web app can now sign users in with Google. The browser starts the popup, while Fusabase stores the Google client secret and handles the callback.
If you want to build this as part of a complete app, follow the Google social sign-in lab in the Fusabase RecipeShare LiveLab.
Until next time,
-Killian