How to Put an API Gateway in Front of Fusabase
Today, we're going to walk through how to set up an OCI API Gateway in front of an existing Fusabase environment.
This guide assumes you already have Oracle AI Database, ORDS, and Fusabase up and running. We're only going to focus on the API Gateway steps that make your existing Fusabase app reachable through a public HTTPS endpoint.
What you need before you begin
You should already have:
- An Oracle AI Database with ORDS configured and running.
- Fusabase enabled and serving your existing Fusabase app.
- An OCI tenancy and compartment.
- The hostname or IP address and listener port that the gateway can use to reach ORDS.
What we are building
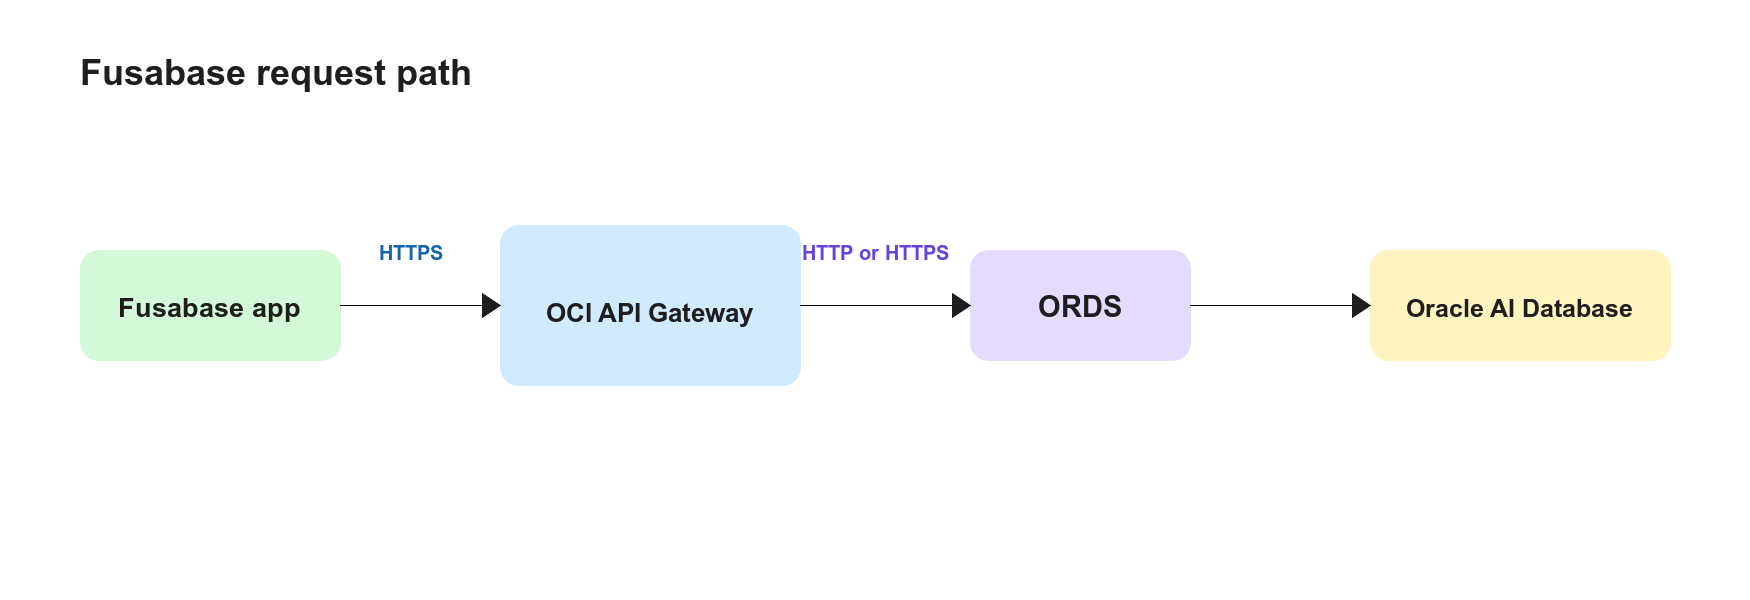
The request path will look like this:
Fusabase app
      |
      v
OCI API Gateway over HTTPS
      |
      v
ORDS over HTTP or HTTPS
      |
      v
Oracle AI Database with Fusabase enabled
The API Gateway is the public entry point. ORDS stays behind it as the backend that serves the Fusabase API.
Step 1: Prepare the gateway network
Before creating the gateway, make sure you know which subnet it will use and which network address the gateway will use to reach ORDS.
Public or private?
OCI API Gateway can be public or private.
A public gateway has an internet-facing endpoint. Use one when your Fusabase app or integration needs to call the API from outside your VCN.
A private gateway is reachable only through a private network, such as a VPN. Use one when the API should stay inside your private network or another public service will sit in front of it.
For this walkthrough, create a public gateway so the finished API can be called from a laptop or an application outside the VCN.
Network rules for a public gateway
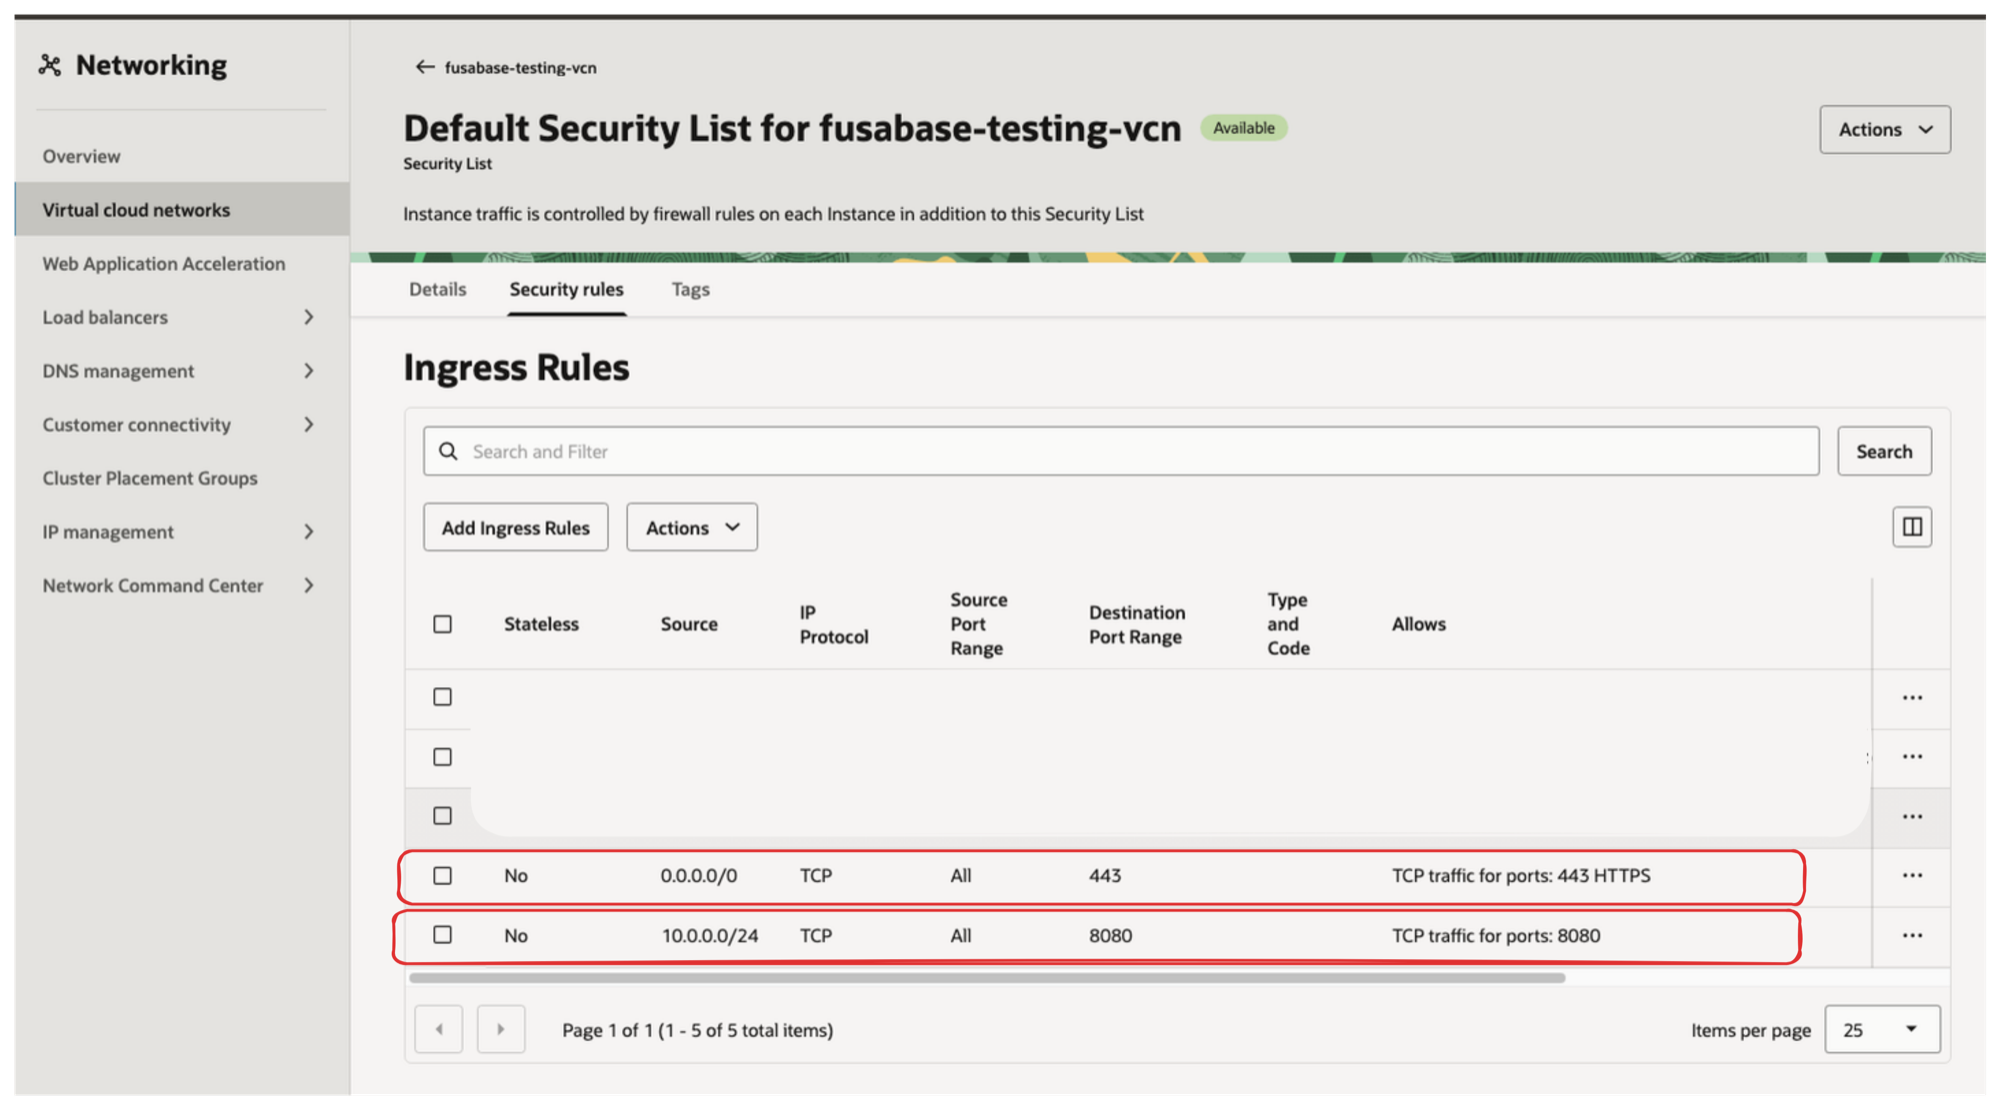
For a public gateway, start by adding an ingress rule to the security list attached to the gateway subnet.
In the OCI Console, go to:
Networking > Virtual cloud networks > <VCN> > Subnets > <GATEWAY_SUBNET> > Security
On the subnet's Security tab, select the security list attached to the subnet. This is often called Default Security List for <VCN>. Then select Security Rules and Add Ingress Rules.
Enter these values:
| Setting | Value |
|---|---|
| Source type | CIDR |
| Source CIDR | 0.0.0.0/0 for a public API, or <YOUR_PUBLIC_IP>/32 for a temporary test |
| IP protocol | TCP |
| Source port range | All |
| Destination port range | 443 |
| Stateless | Off |
Select Add Ingress Rules to save the rule.
Allow the gateway to reach ORDS
Now add a second ingress rule for the ORDS backend. This rule belongs on the security list or network security group protecting the ORDS host.
For this walkthrough, we assume ORDS is in the same subnet as the gateway. If your ORDS host is in a different subnet, use that subnet's security list or NSG for this rule instead. If ORDS and the gateway use the same security list, you can add this rule to the same list. It still controls a different traffic hop.
Find the gateway subnet CIDR
<GATEWAY_SUBNET_CIDR> is the IPv4 CIDR block assigned to the subnet where you will create the API Gateway.
To find it in the OCI Console:
- Open Networking > Virtual cloud networks.
- Select
<VCN>. - Select Subnets.
- Select
<GATEWAY_SUBNET>. - On the subnet's Details tab, copy the value next to IPv4 CIDR Block.
Use the complete value, including the suffix. For example, a subnet CIDR has a form like 10.0.0.0/24. Do not use the gateway's public IP address or the VCN's larger CIDR block.
Add an ingress rule with these values:
| Setting | Value |
|---|---|
| Source type | CIDR |
| Source CIDR | <GATEWAY_SUBNET_CIDR> |
| IP protocol | TCP |
| Source port range | All |
| Destination port range | <ORDS_PORT> |
| Stateless | Off |
If ORDS runs on a VM, the VM's host firewall needs to allow the same traffic. Do not open <ORDS_PORT> to 0.0.0.0/0; only the gateway subnet should need access to it.
Use the ORDS address that is reachable from the gateway. It may be a private IP address or an internal DNS name. Do not use localhost unless ORDS is running inside the same network namespace as the gateway, which is not the normal setup.
Keep the ORDS listener private if possible. The goal is for clients to reach the public gateway, while only the gateway can reach the backend.
For more information, see Creating a VCN and subnet for API Gateway.
Step 2: Create the API Gateway
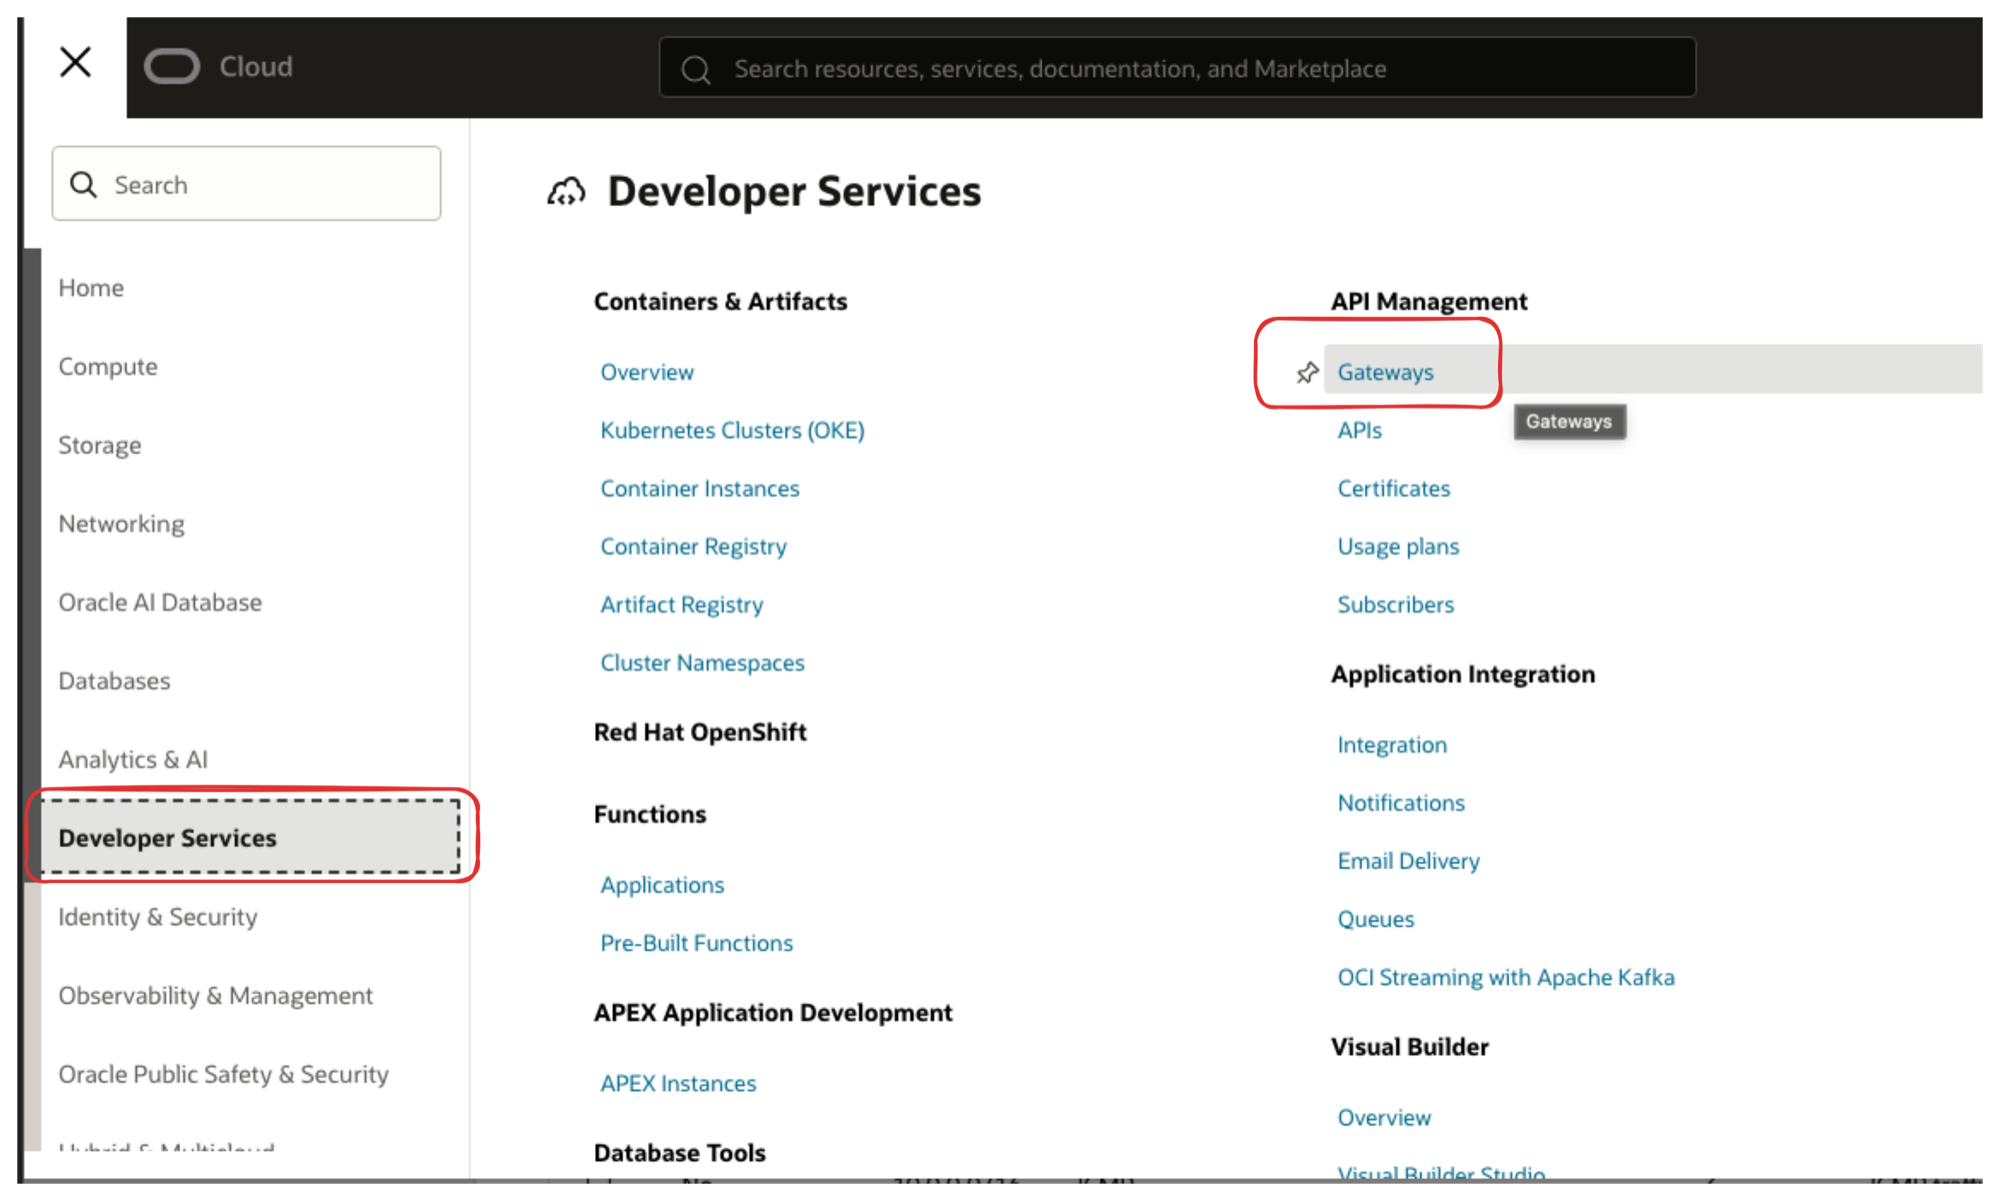
In the OCI Console, open:
Developer Services > API Management > Gateways
Select Create Gateway.
Step 3: Complete the Create gateway form
Basic information
| Field | Value |
|---|---|
| Name | fusabase-ords-gateway |
| Compartment | <COMPARTMENT> |
Choose the compartment where you want the gateway resource to live.
Certificate
In Certificate compartment, select the compartment that contains the certificate. Then select a value in Certificate.
For the first test, choose Default (*.oci.customer-oci.com). OCI provides an HTTPS hostname for the gateway, and this certificate covers that hostname.
If you will use a custom hostname such as api.example.com, select a custom certificate that covers that hostname. You will also need to configure DNS for the custom hostname after the gateway is created.
For a production endpoint, use a certificate that matches your custom domain and follow your normal certificate renewal process.
If you want the steps for setting up custom domains and TLS certificates, check those docs.
Network
Under Choose visibility type, select Public for this walkthrough. A public gateway receives a public IP address and can be called from outside the VCN.
Under Choose IP mode, select IPv4. Choose Dual Stack or IPv6 only when your clients and network are configured to use those address types.
Under Choose a VCN and subnet, select:
| Field | Value |
|---|---|
| Virtual cloud network compartment | <VCN_COMPARTMENT> |
| Virtual cloud network | <VCN> |
| Subnet compartment | <SUBNET_COMPARTMENT> |
| Subnet | <GATEWAY_SUBNET> |
The subnet must be the public regional subnet whose ingress rule you configured earlier.
Leave Enable network security groups turned off for this walkthrough because the instructions above use a security list. If you enable it, the selected network security group also needs rules that allow the required traffic.
Leave IP address configuration options and Advanced options at their defaults for the first setup.
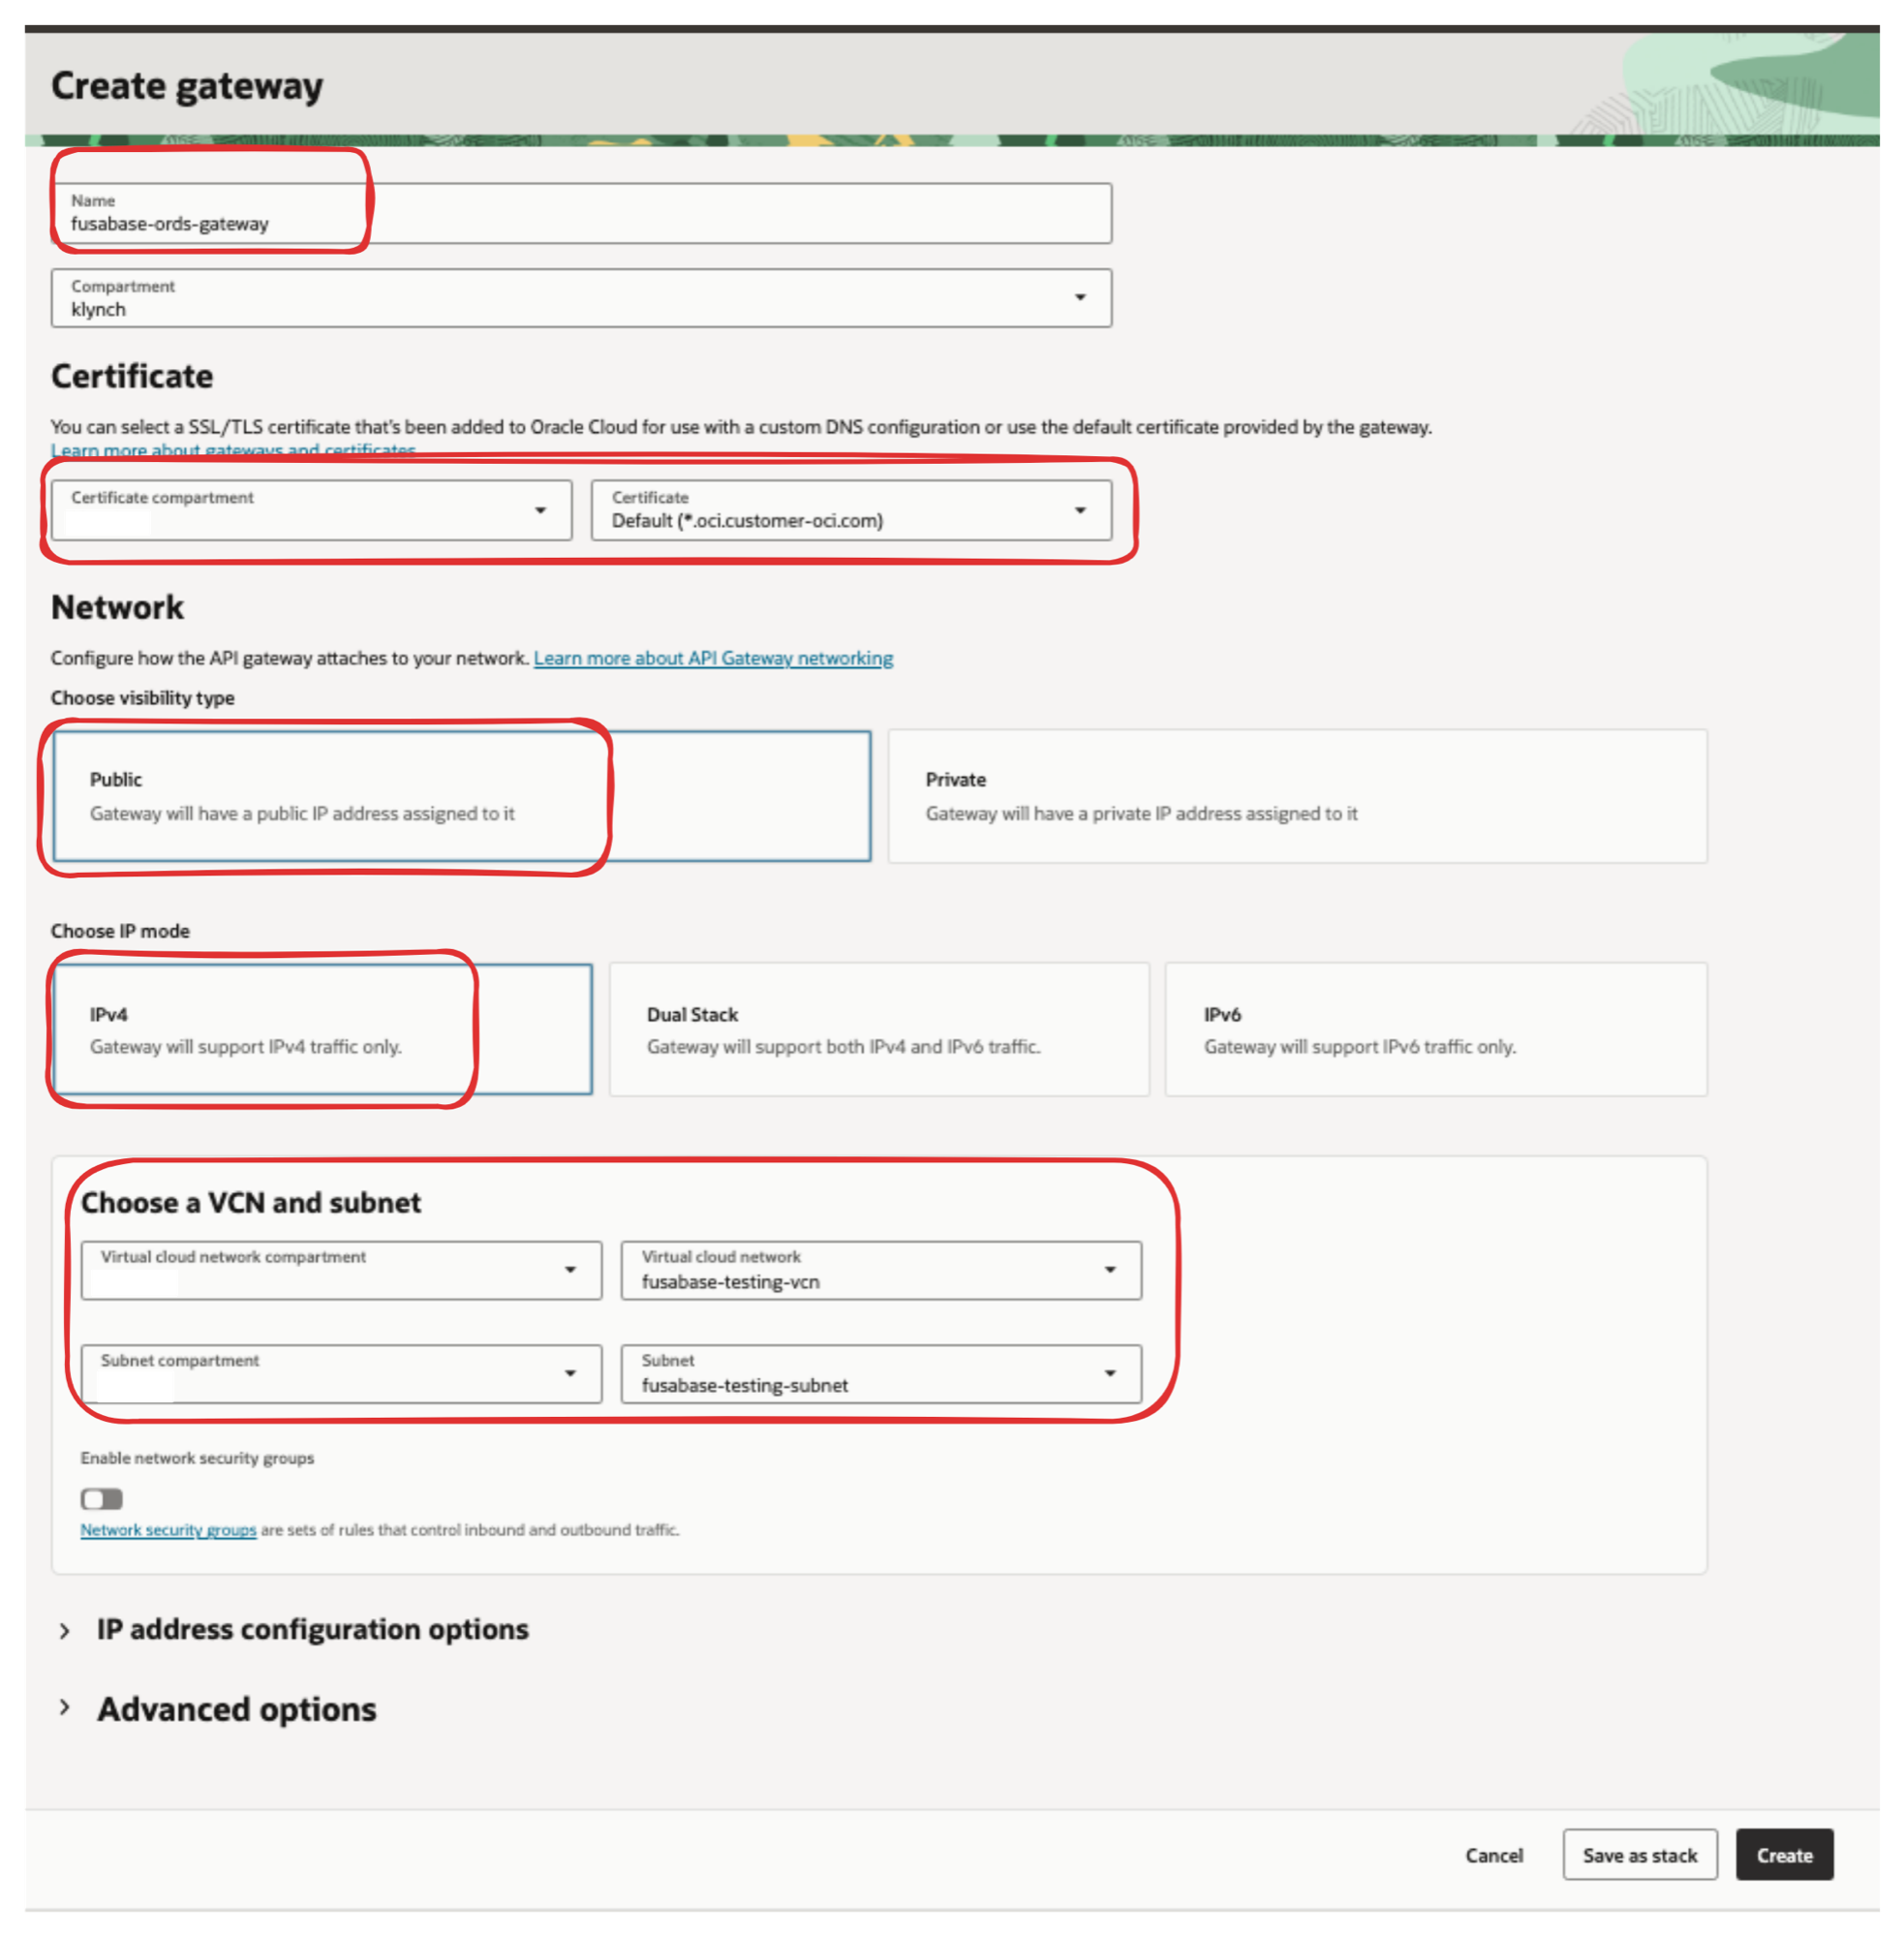
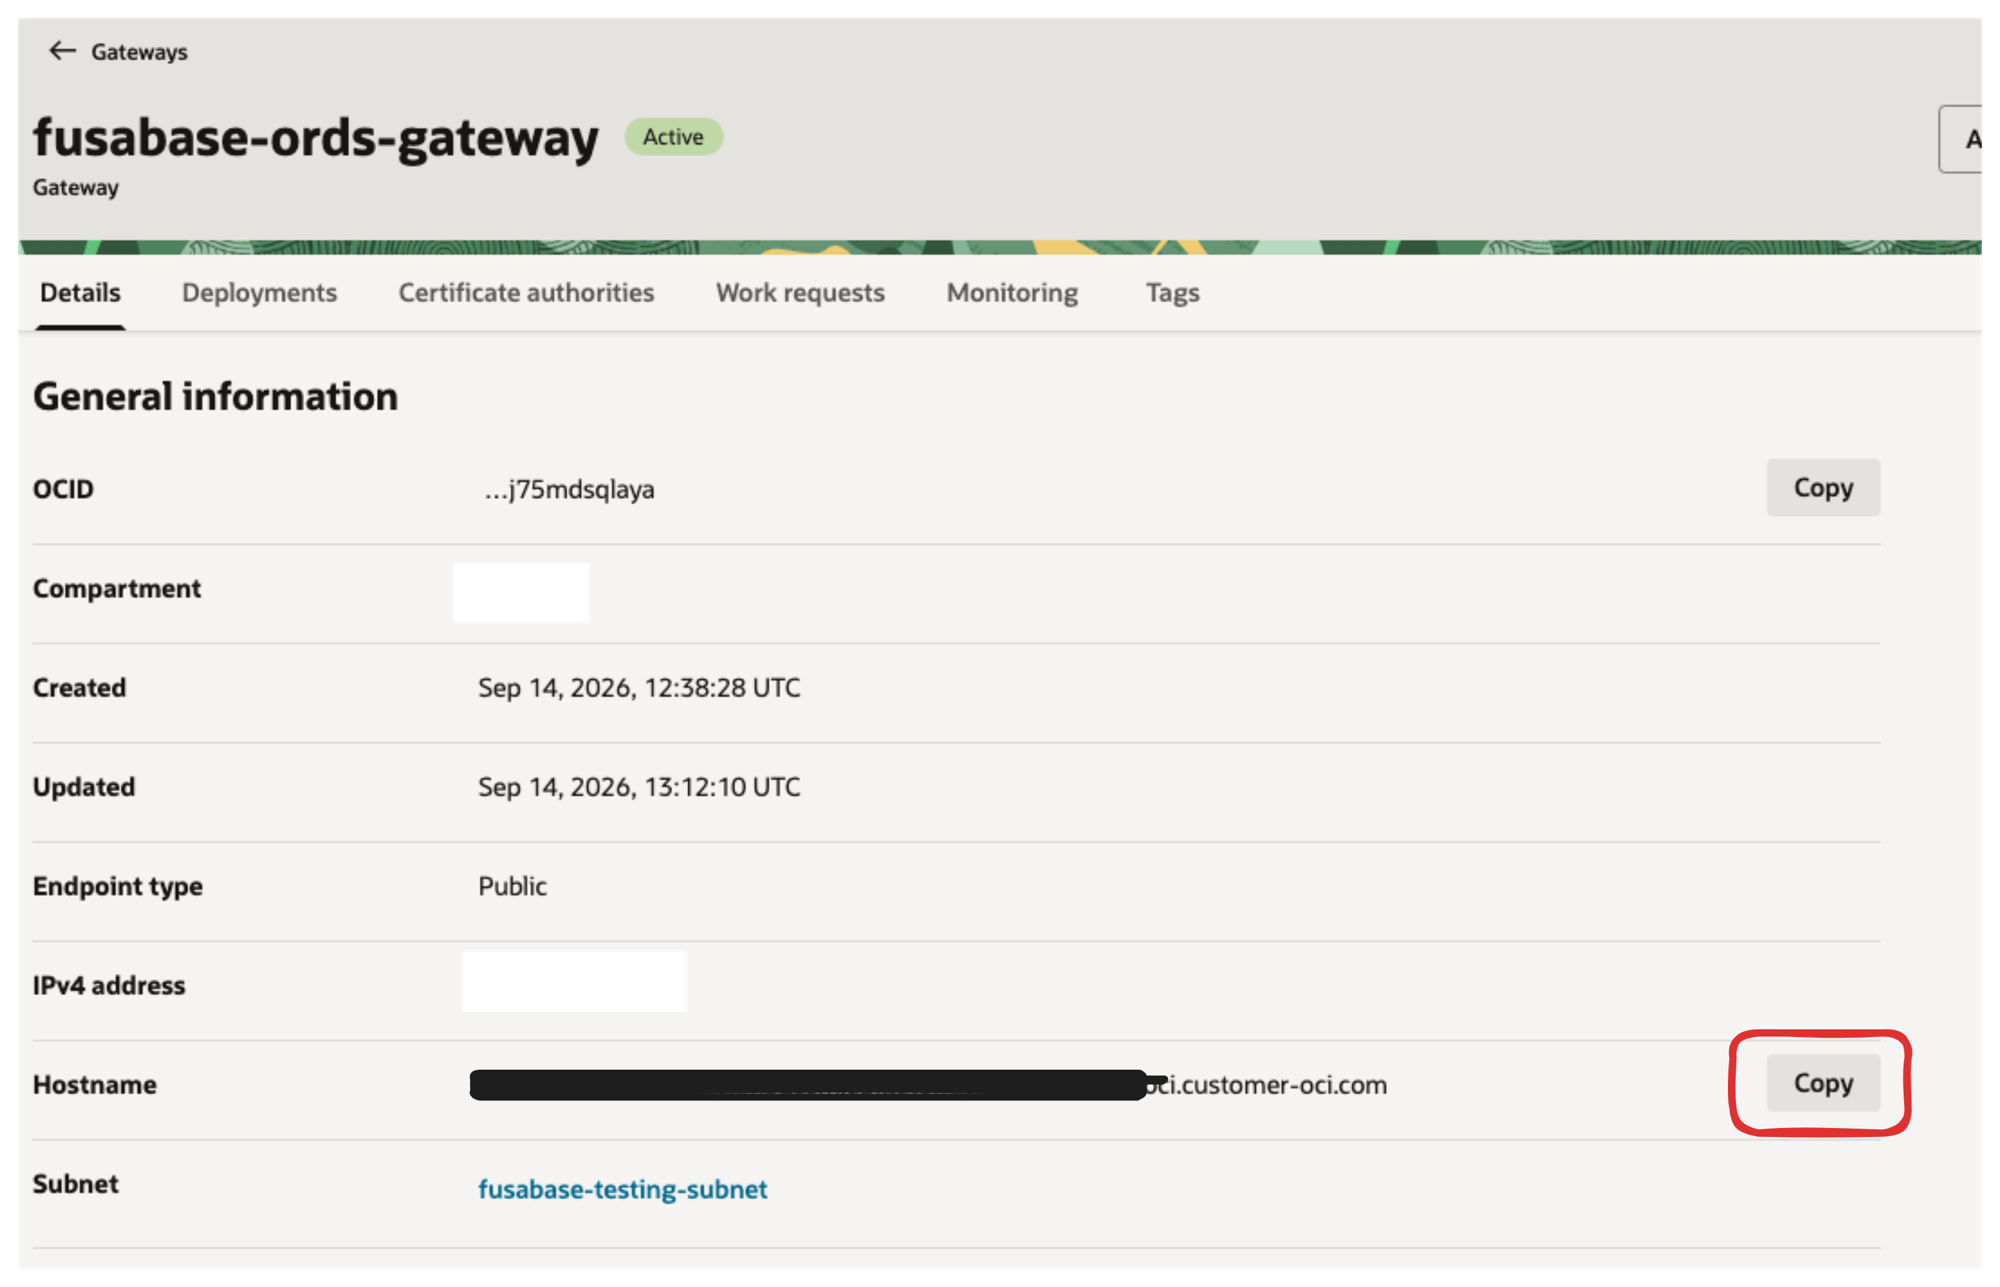
Select Create and wait for the gateway to become Active. Copy the hostname OCI gives you. We will use it later as <GATEWAY_HOSTNAME>.
Step 4: Create the deployment
The gateway is the network entry point. The deployment tells it which requests to accept and where to send them.
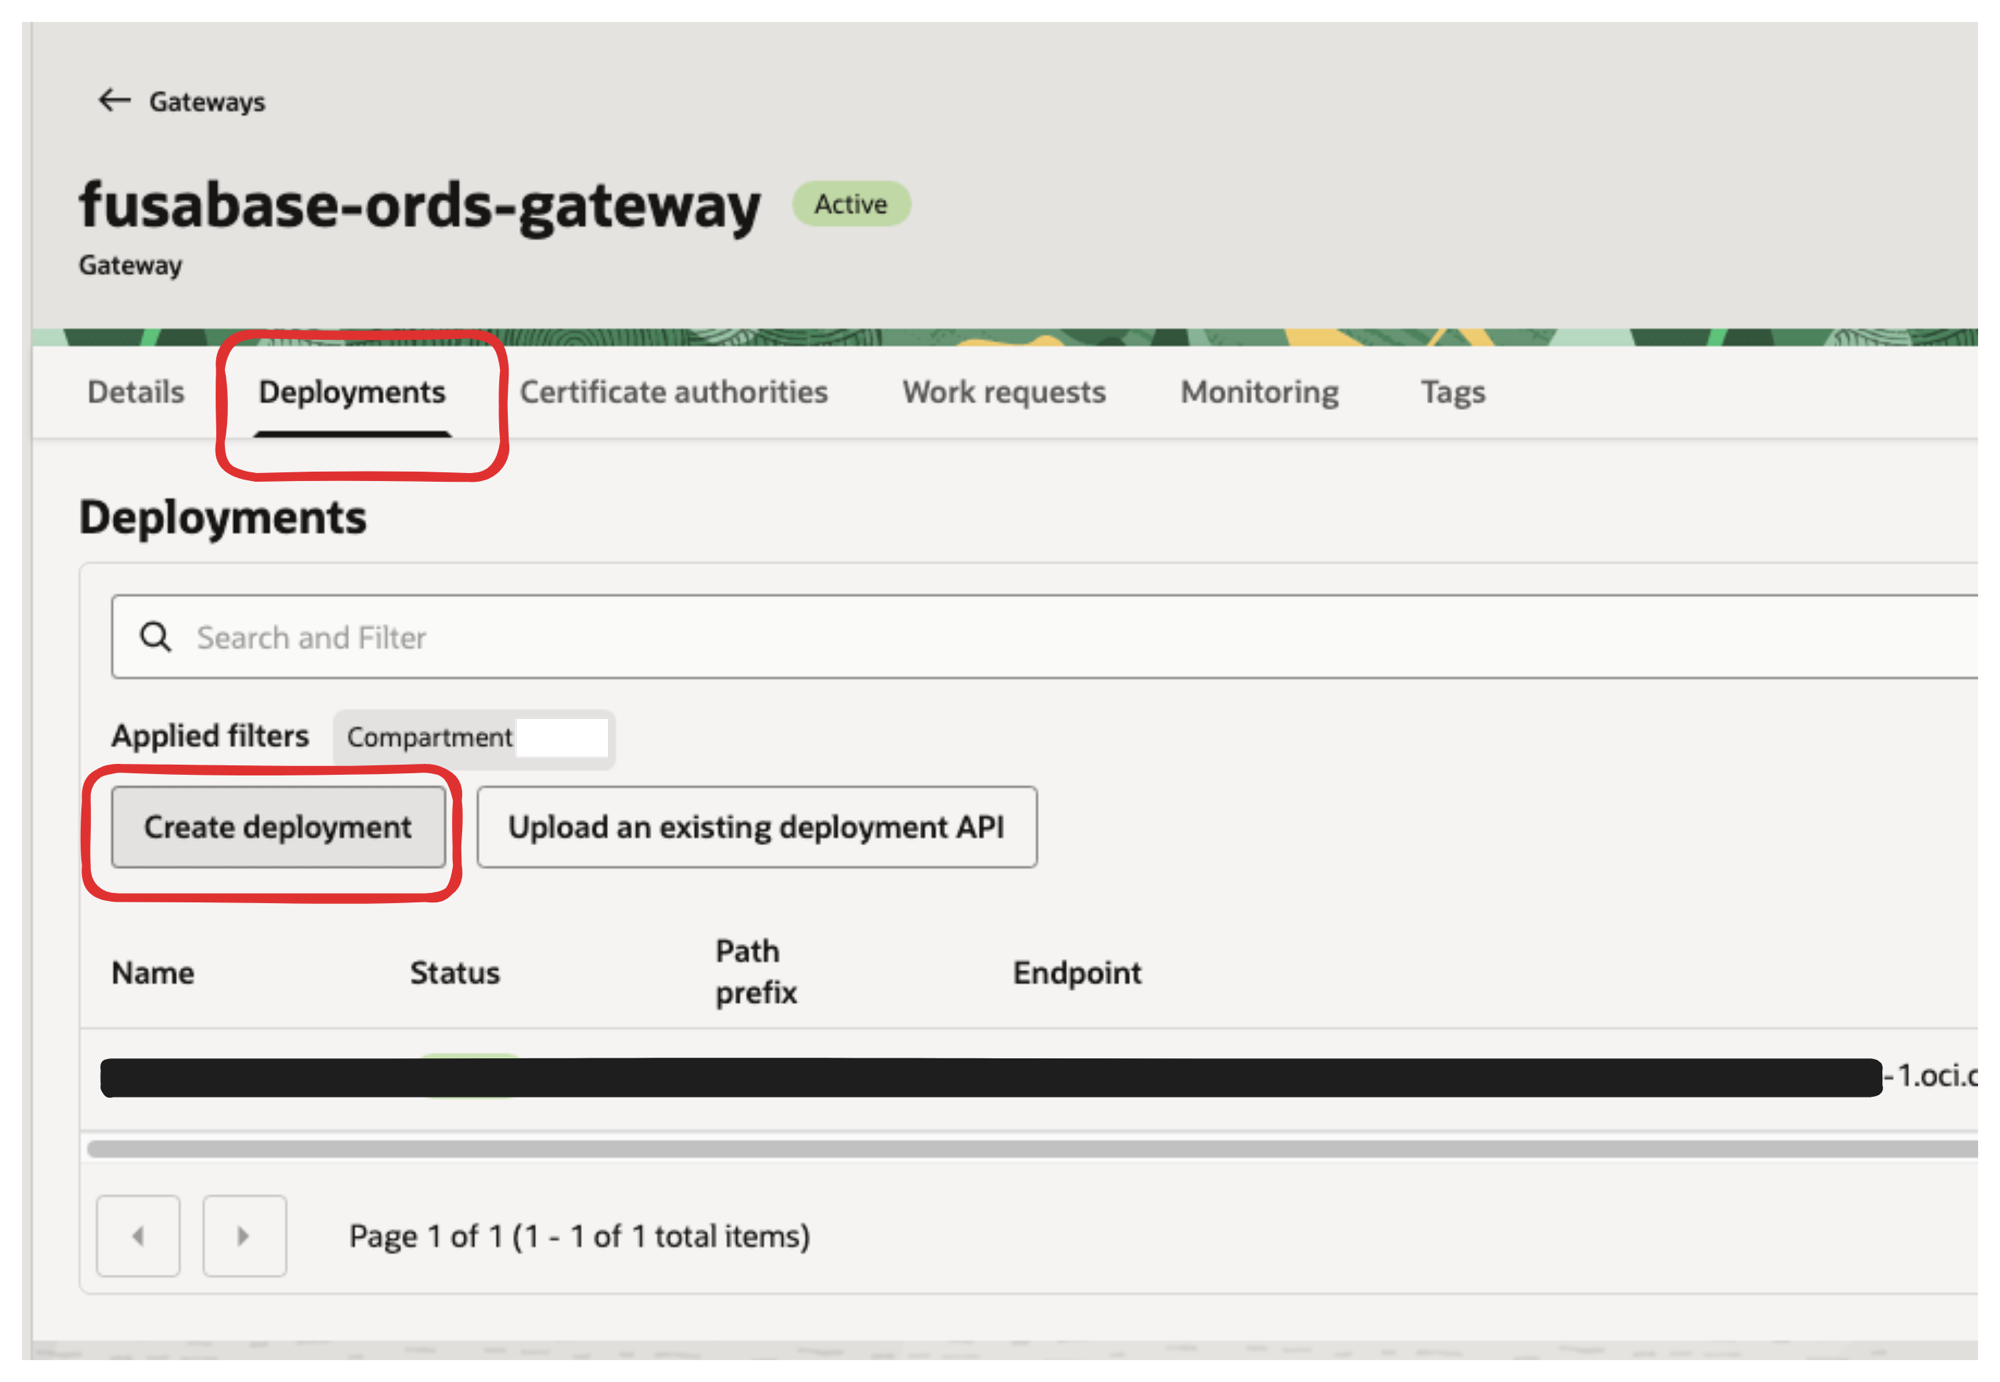
Open the gateway, select the Deployments tab, and choose Create deployment.
Basic information
| Field | Value |
|---|---|
| Name | fusabase-ords |
| Path prefix | / |
| Compartment | <COMPARTMENT> |
What is the path prefix?
The path prefix is the first part of the URL added before the routes in this deployment.
Use / so the public URL keeps the normal ORDS path:
https://<GATEWAY_HOSTNAME>/ords/...API request policies
These settings are optional. For the first route test, use the following choices:
| Policy | First-test choice |
|---|---|
| Mutual-TLS | Disabled |
| CORS | Leave unconfigured unless a browser app needs cross-origin access |
| Rate limiting | Leave unconfigured while testing the route |
| Usage plans | Leave unconfigured unless you already have subscriber plans |
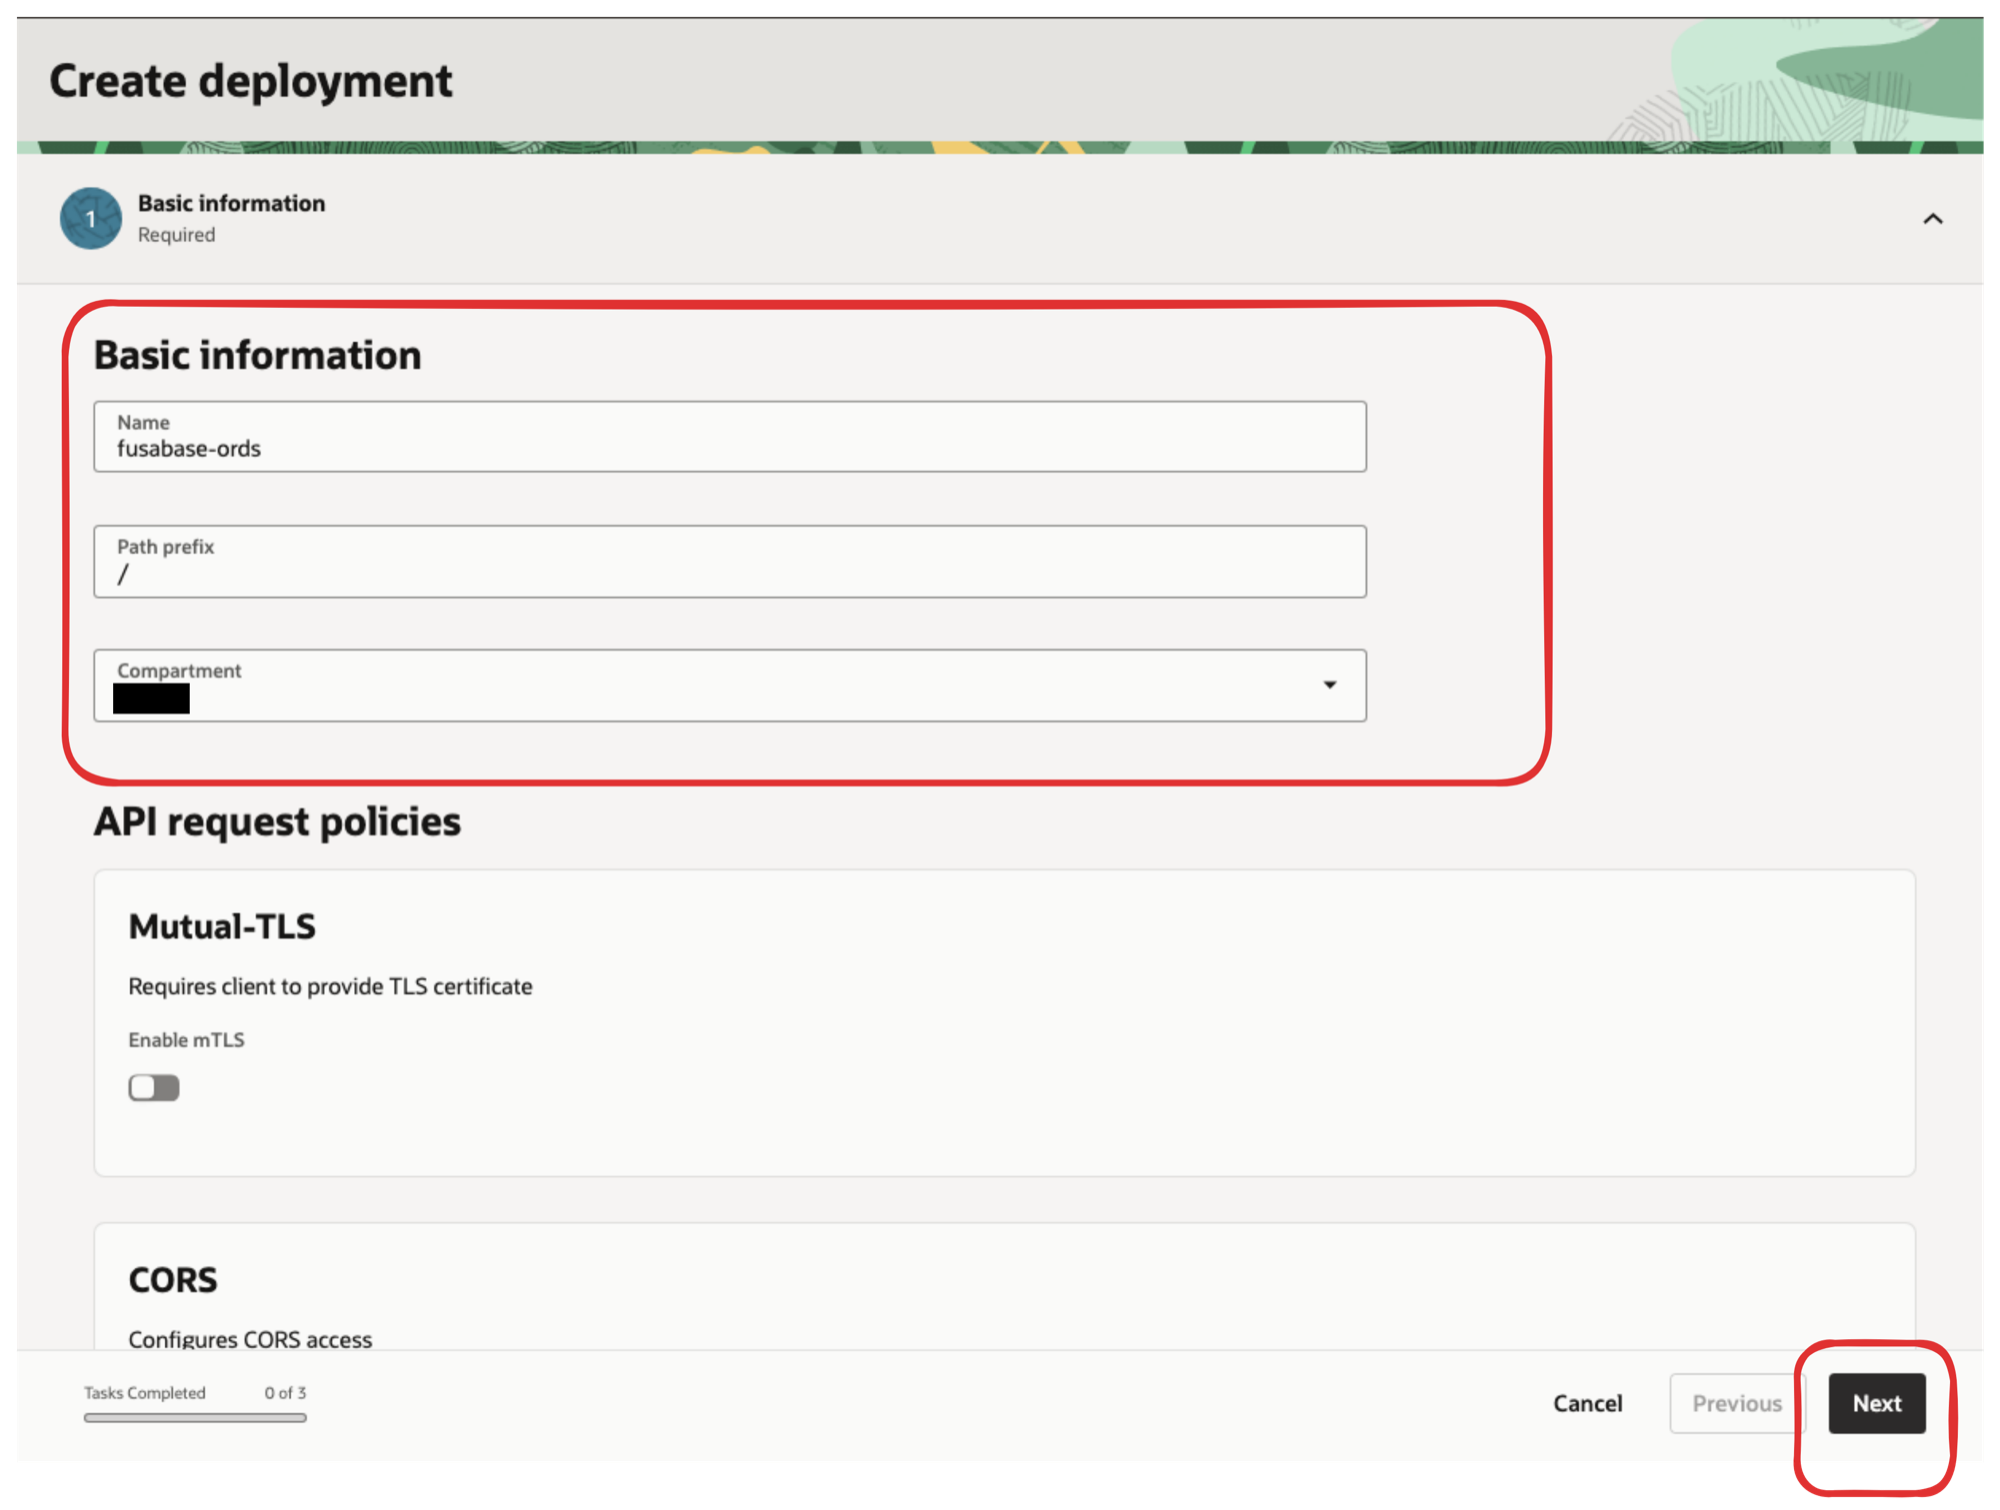
Select Next at the bottom of the form to continue to Authentication.
Step 5: Configure authentication
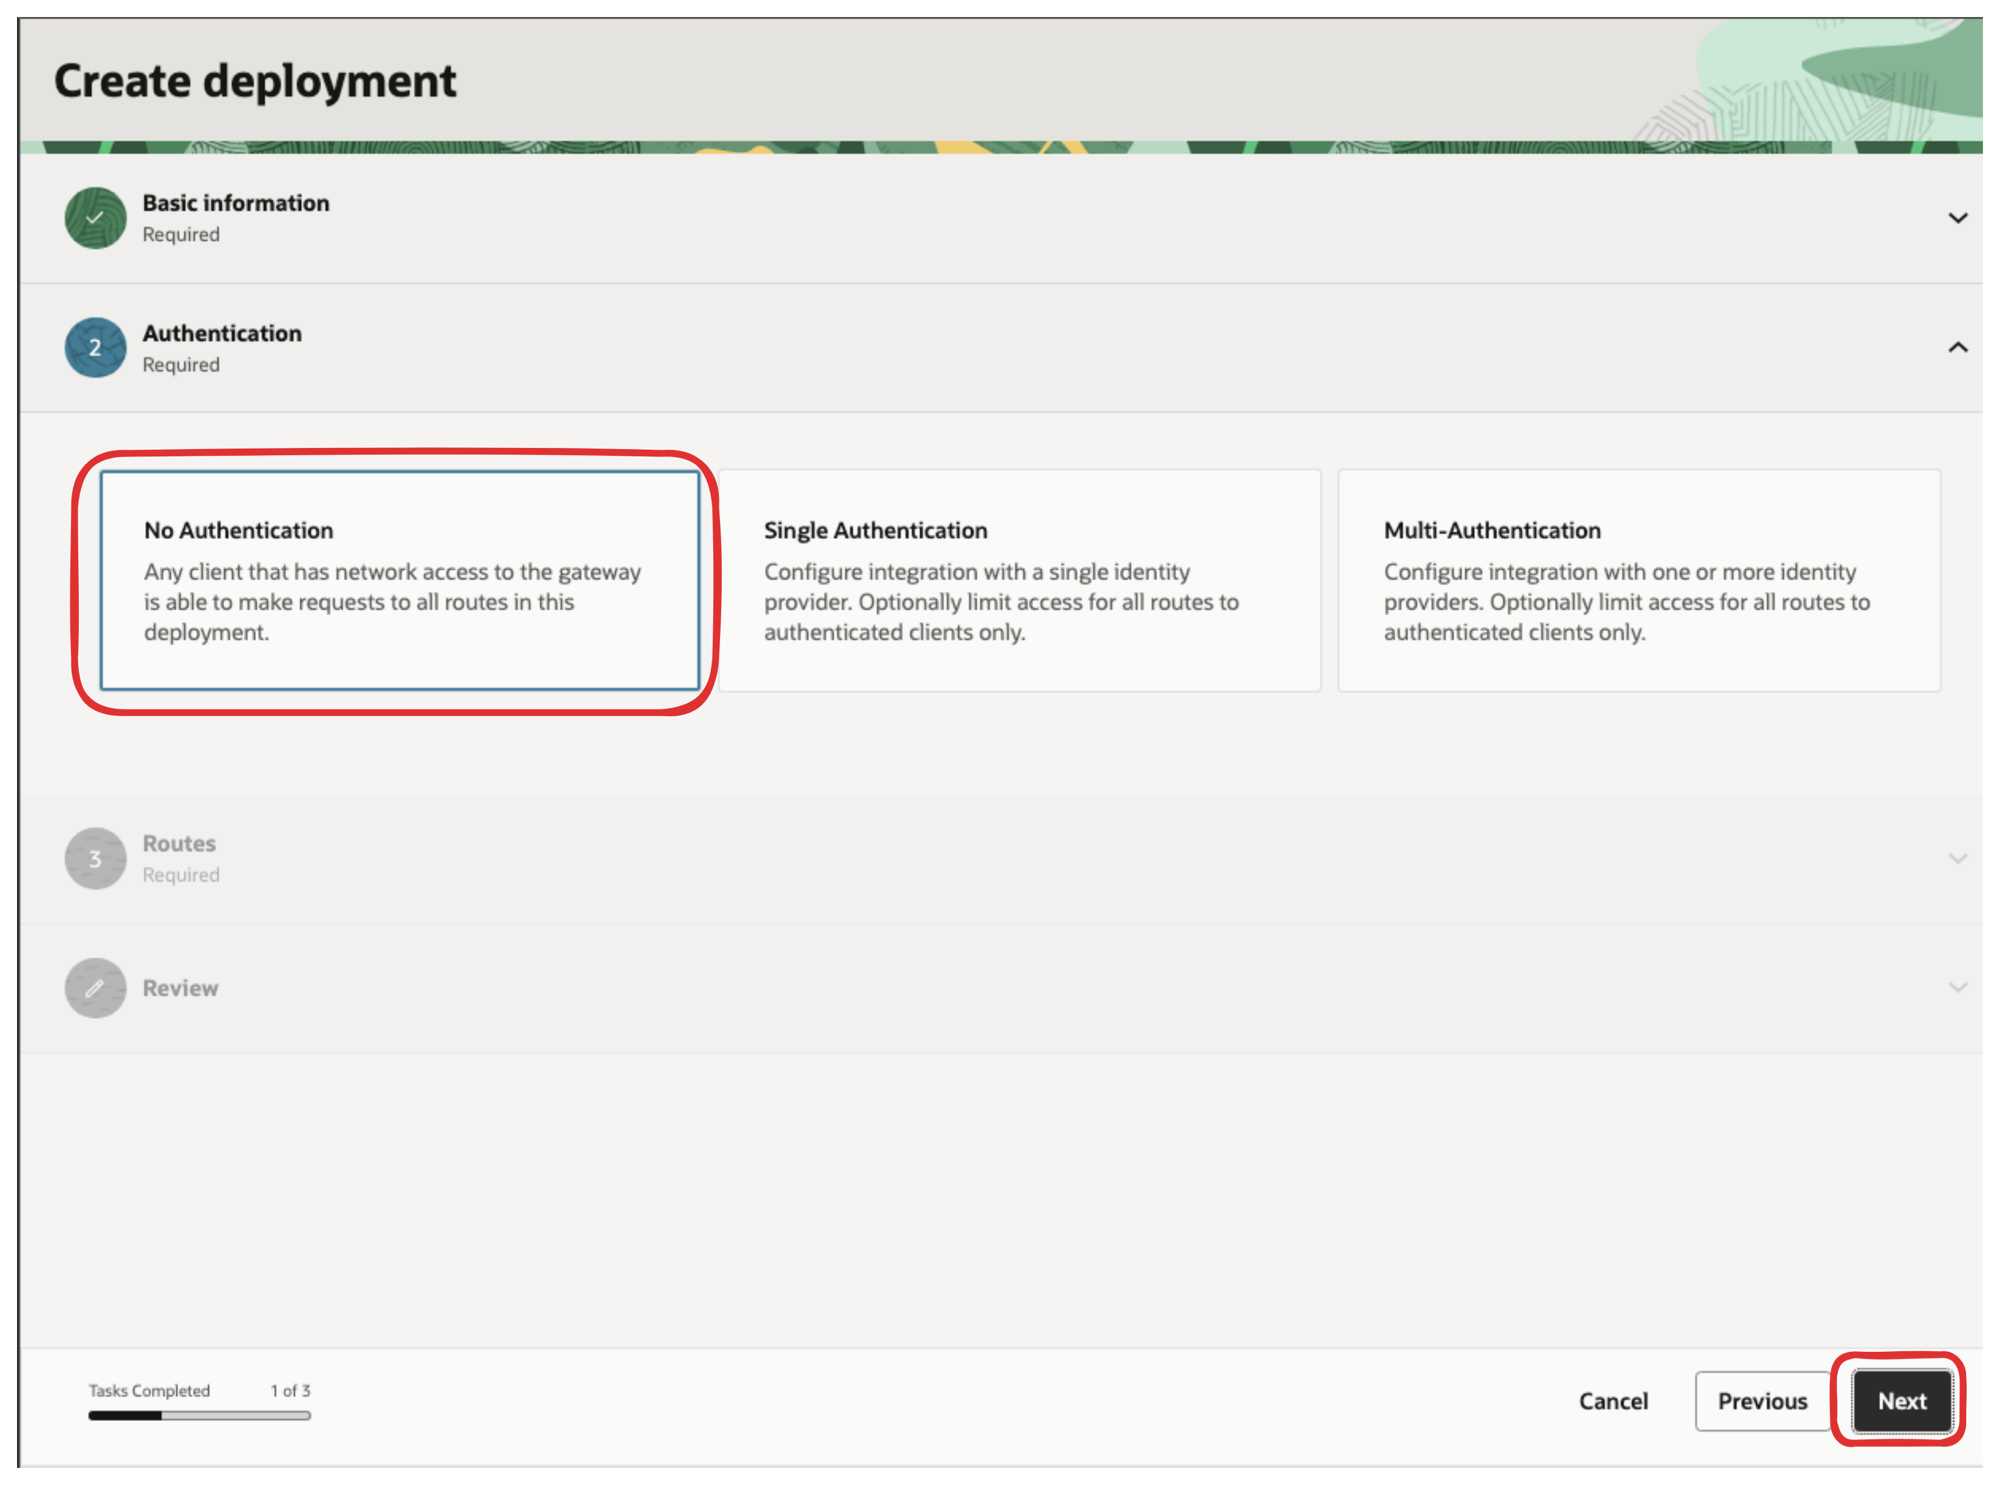
The Authentication page controls whether OCI API Gateway checks a caller before forwarding the request to ORDS.
Choose No Authentication for the first route test. This lets you confirm that the gateway can receive a request and forward it to ORDS.
That setting is separate from Fusabase authentication. A public gateway with No Authentication does not mean that Fusabase data is automatically available to everyone. Fusabase and ORDS can still process the request's normal authentication and authorization requirements.
For production, make a deliberate decision about where authentication belongs. You may use gateway authentication, Fusabase and ORDS authentication, or both layers depending on the application.
Step 6: Add the ORDS route
Under Routes, select Add route.
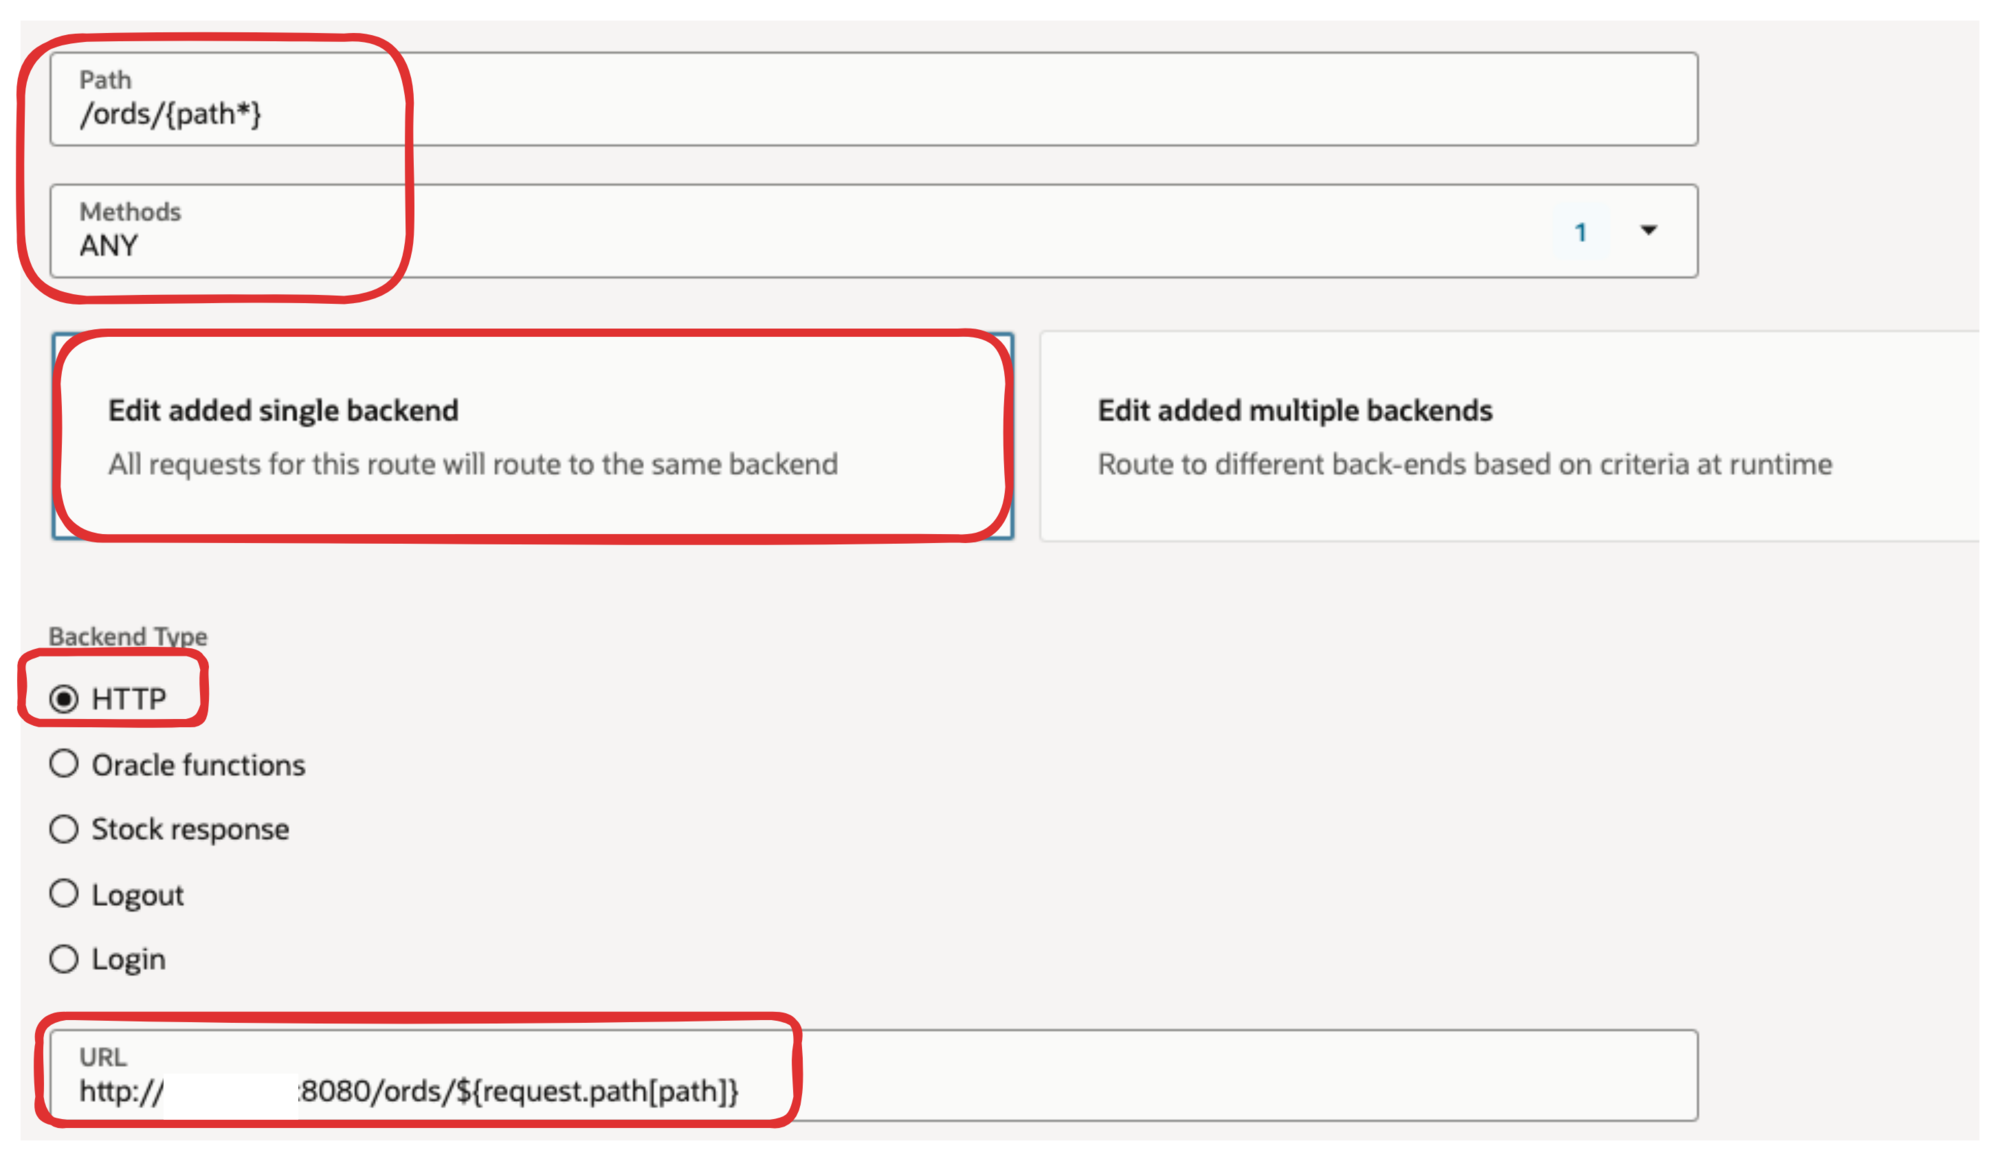
For Path, enter this value literally:
/ords/{path*}For Methods, choose:
ANYThis allows the route to receive the different HTTP methods used by ORDS and Fusabase, including GET, POST, PATCH, PUT, and DELETE.
Next, choose Add a single backend. Select HTTP as the backend type for this example.
For URL, use:
http://<ORDS_HOST>:<ORDS_PORT>/ords/${request.path[path]}Replace <ORDS_HOST> and <ORDS_PORT> with the address and port that the gateway can reach.
For example, the shape is:
http://<INTERNAL_ORDS_HOST>:<ORDS_PORT>/ords/${request.path[path]}Because the gateway and ORDS are in the same VCN, use ORDS's private address here. This keeps ORDS off the public internet while the gateway remains the public entry point.
If the gateway is in a different VCN, you need network connectivity between the VCNs, such as VCN peering or a DRG, plus route rules and security rules in both directions.
The ${request.path[path]} expression inserts the portion captured by {path*}.
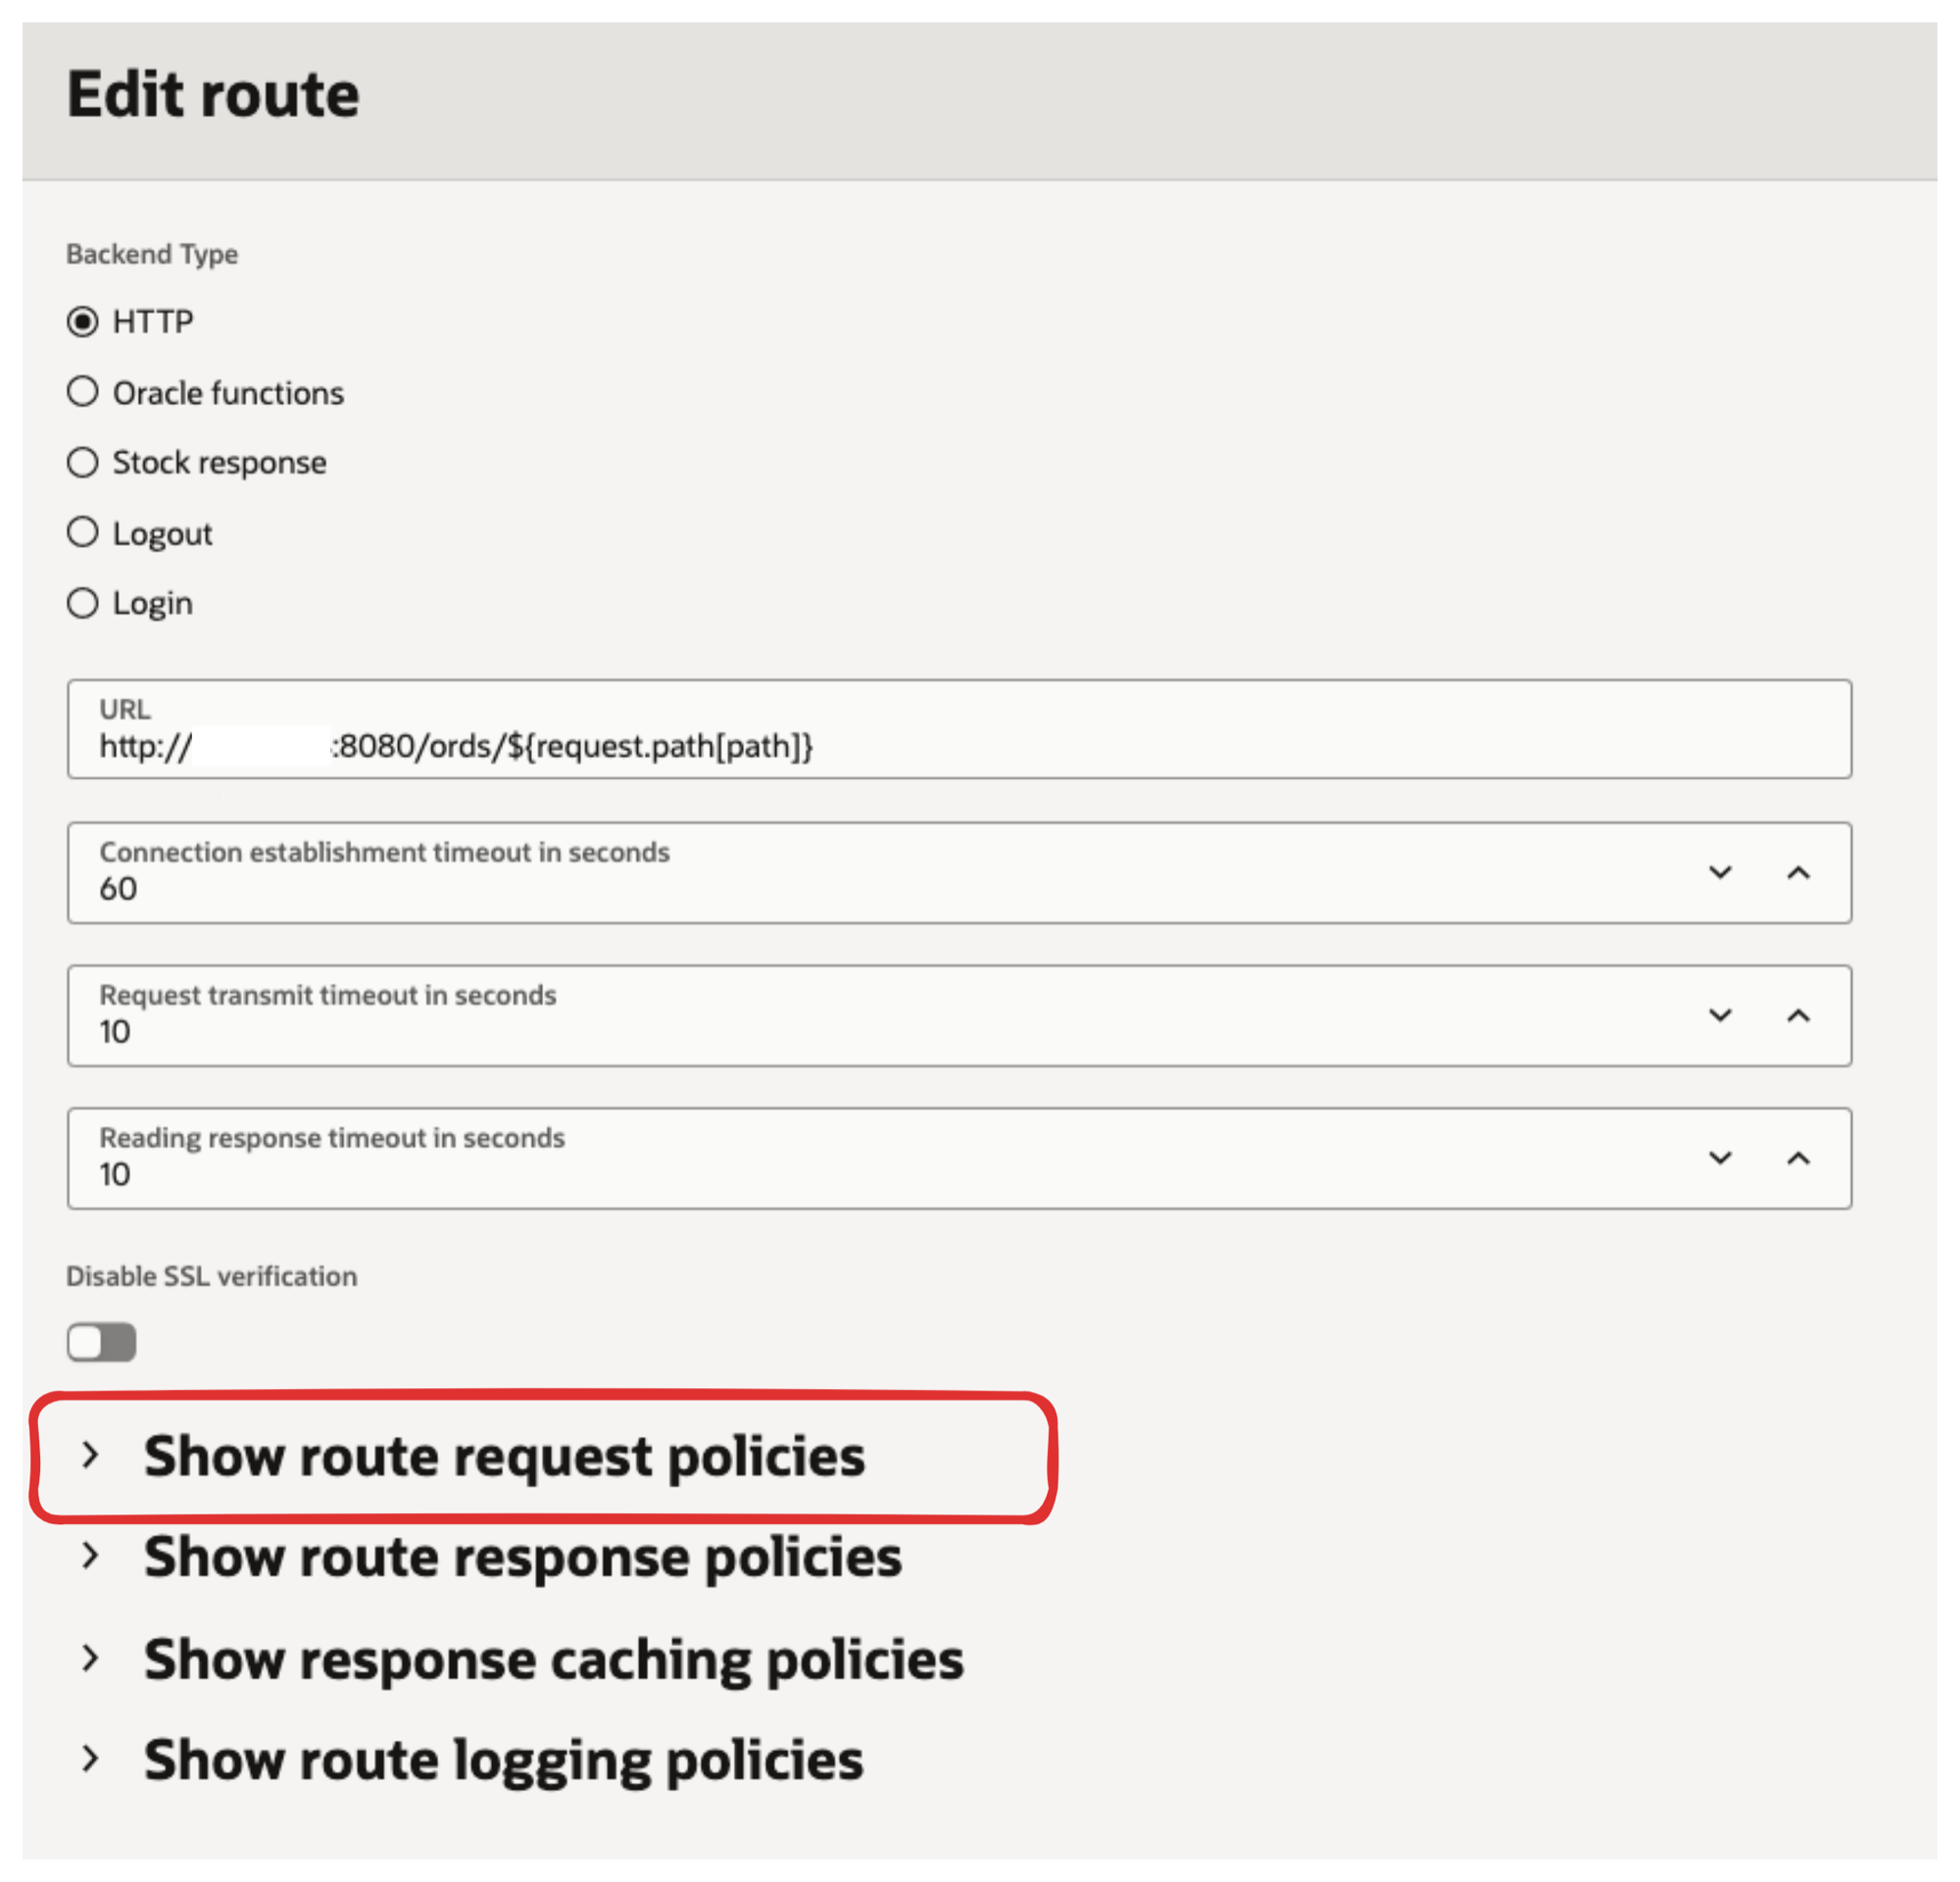
Set the connection, request transmit, and response reading timeouts to values that make sense for your environment. The defaults are fine for the first test. Increase them later if your Fusabase operations include long-running requests or larger uploads.
Step 7: Add the forwarded headers
Select Show route request policies.
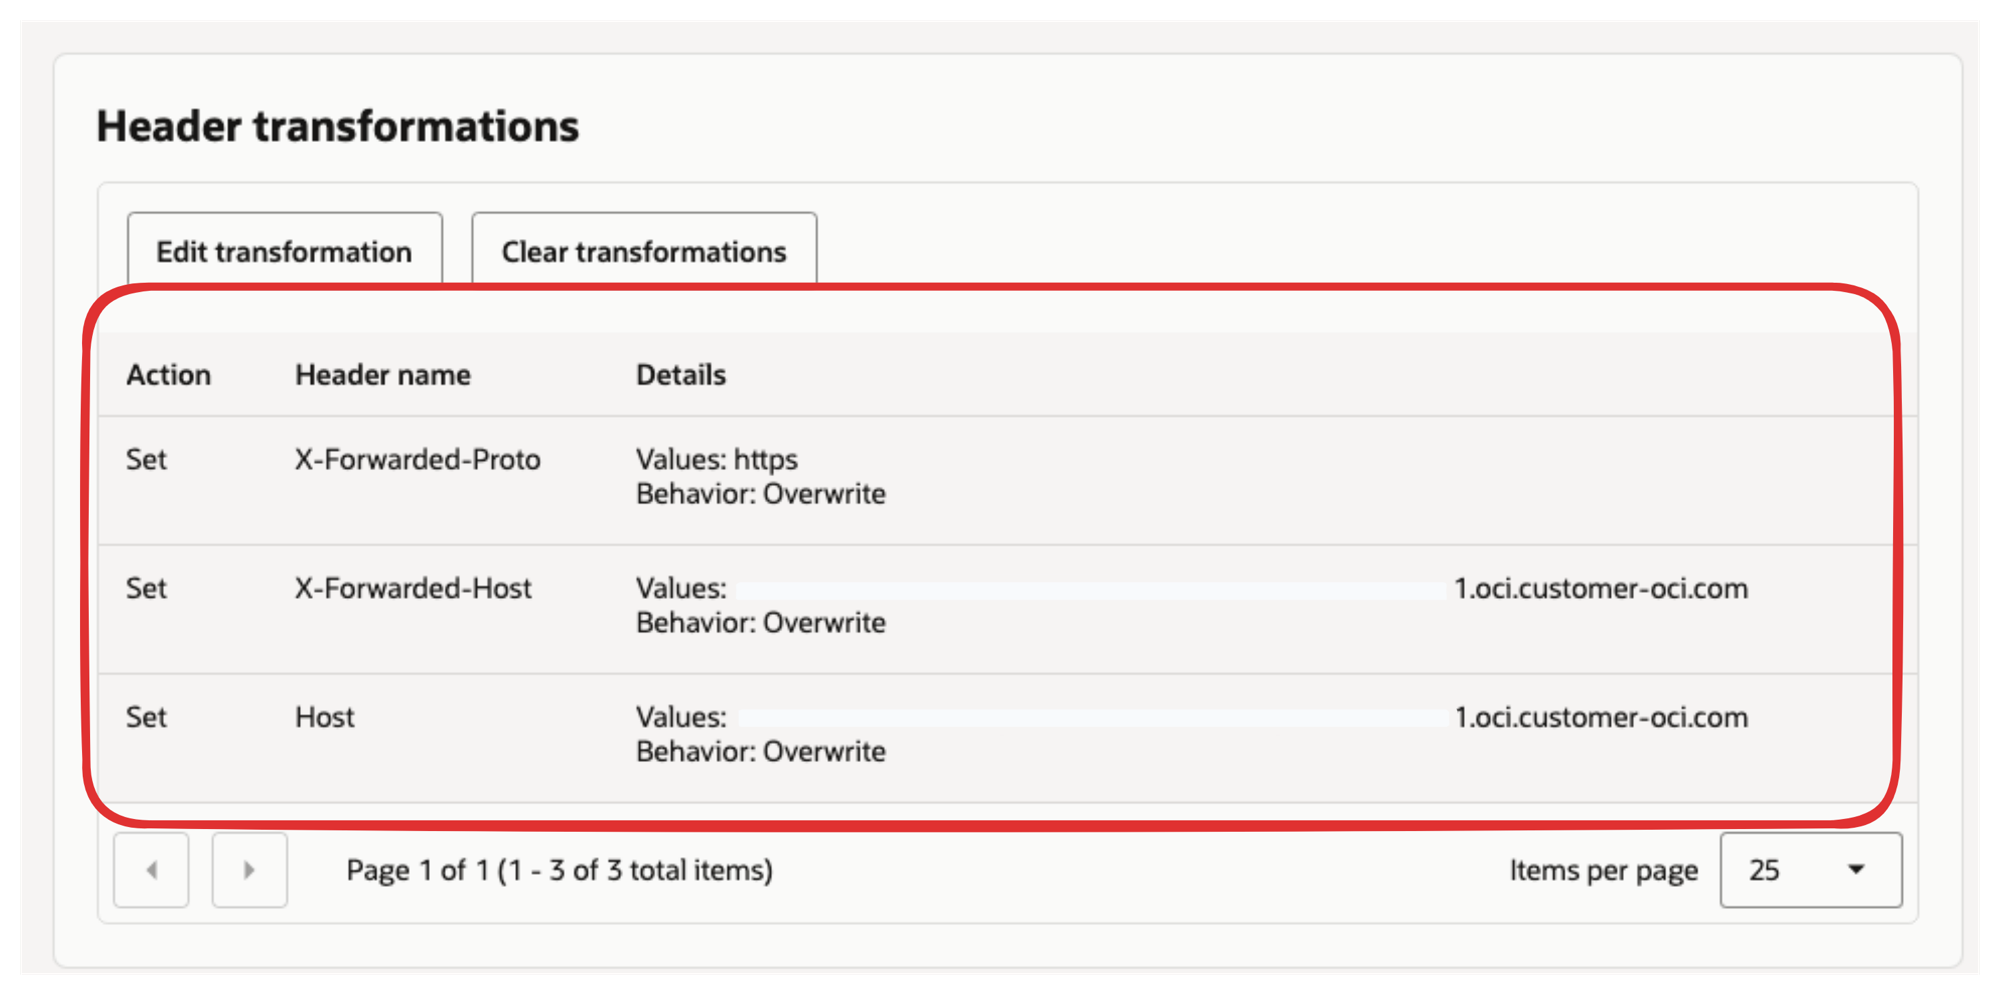
The gateway receives HTTPS from the client, then may use HTTP to reach ORDS. Add headers so ORDS knows the original public request used HTTPS and which hostname the client called.
In Header transformations, add these three transformations:
| Action | Behavior | Header name | Value |
|---|---|---|---|
| Set | Overwrite | X-Forwarded-Proto | https |
| Set | Overwrite | X-Forwarded-Host | <GATEWAY_HOSTNAME> |
| Set | Overwrite | Host | <GATEWAY_HOSTNAME> |
<GATEWAY_HOSTNAME> is the hostname you copied in Step 3.
These headers prevent ORDS from generating links that point to the private backend hostname or use http when the public request used https.
HTTP or HTTPS between the gateway and ORDS?
The client-to-gateway connection is HTTPS.
In this walkthrough, the gateway-to-ORDS connection is HTTP over the private network. That can be appropriate when the path is inside a controlled VCN and the network is protected by security lists, network security groups, and host firewall rules.
Use HTTPS between the gateway and ORDS when the backend traffic crosses an untrusted or broadly shared network, or when your security requirements require encryption on every hop. That requires ORDS to have a trusted certificate and HTTPS listener, which is a separate ORDS configuration task.
Step 8: Deploy the route
Review the deployment configuration, then select Create or Deploy at the bottom of the form.
Wait for the deployment to become Active.
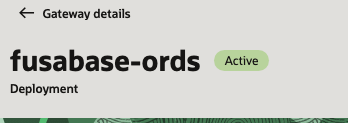
Copy the deployment endpoint and combine it with the ORDS landing path:
https://<GATEWAY_HOSTNAME>/ords/_/landing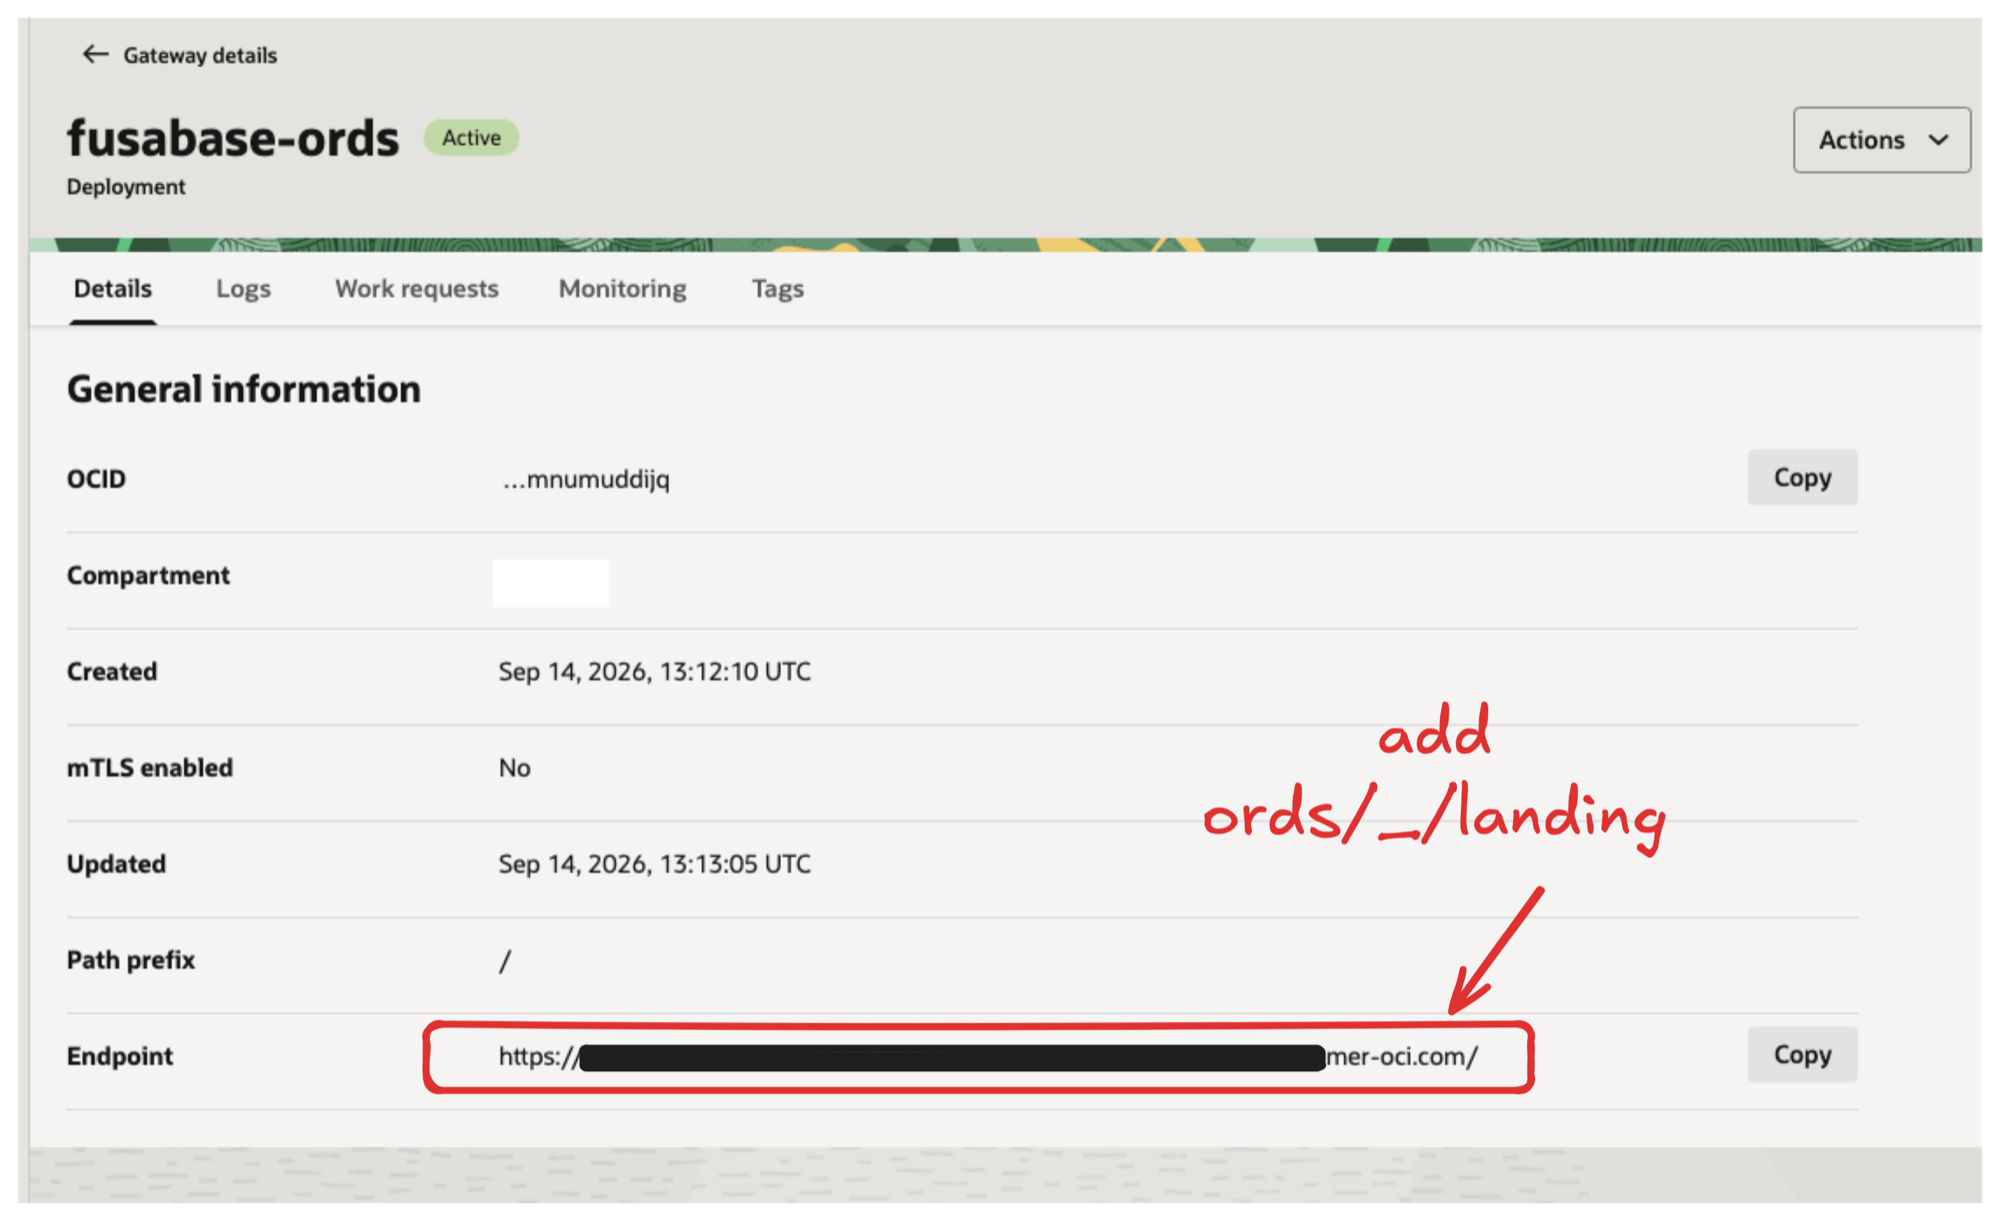
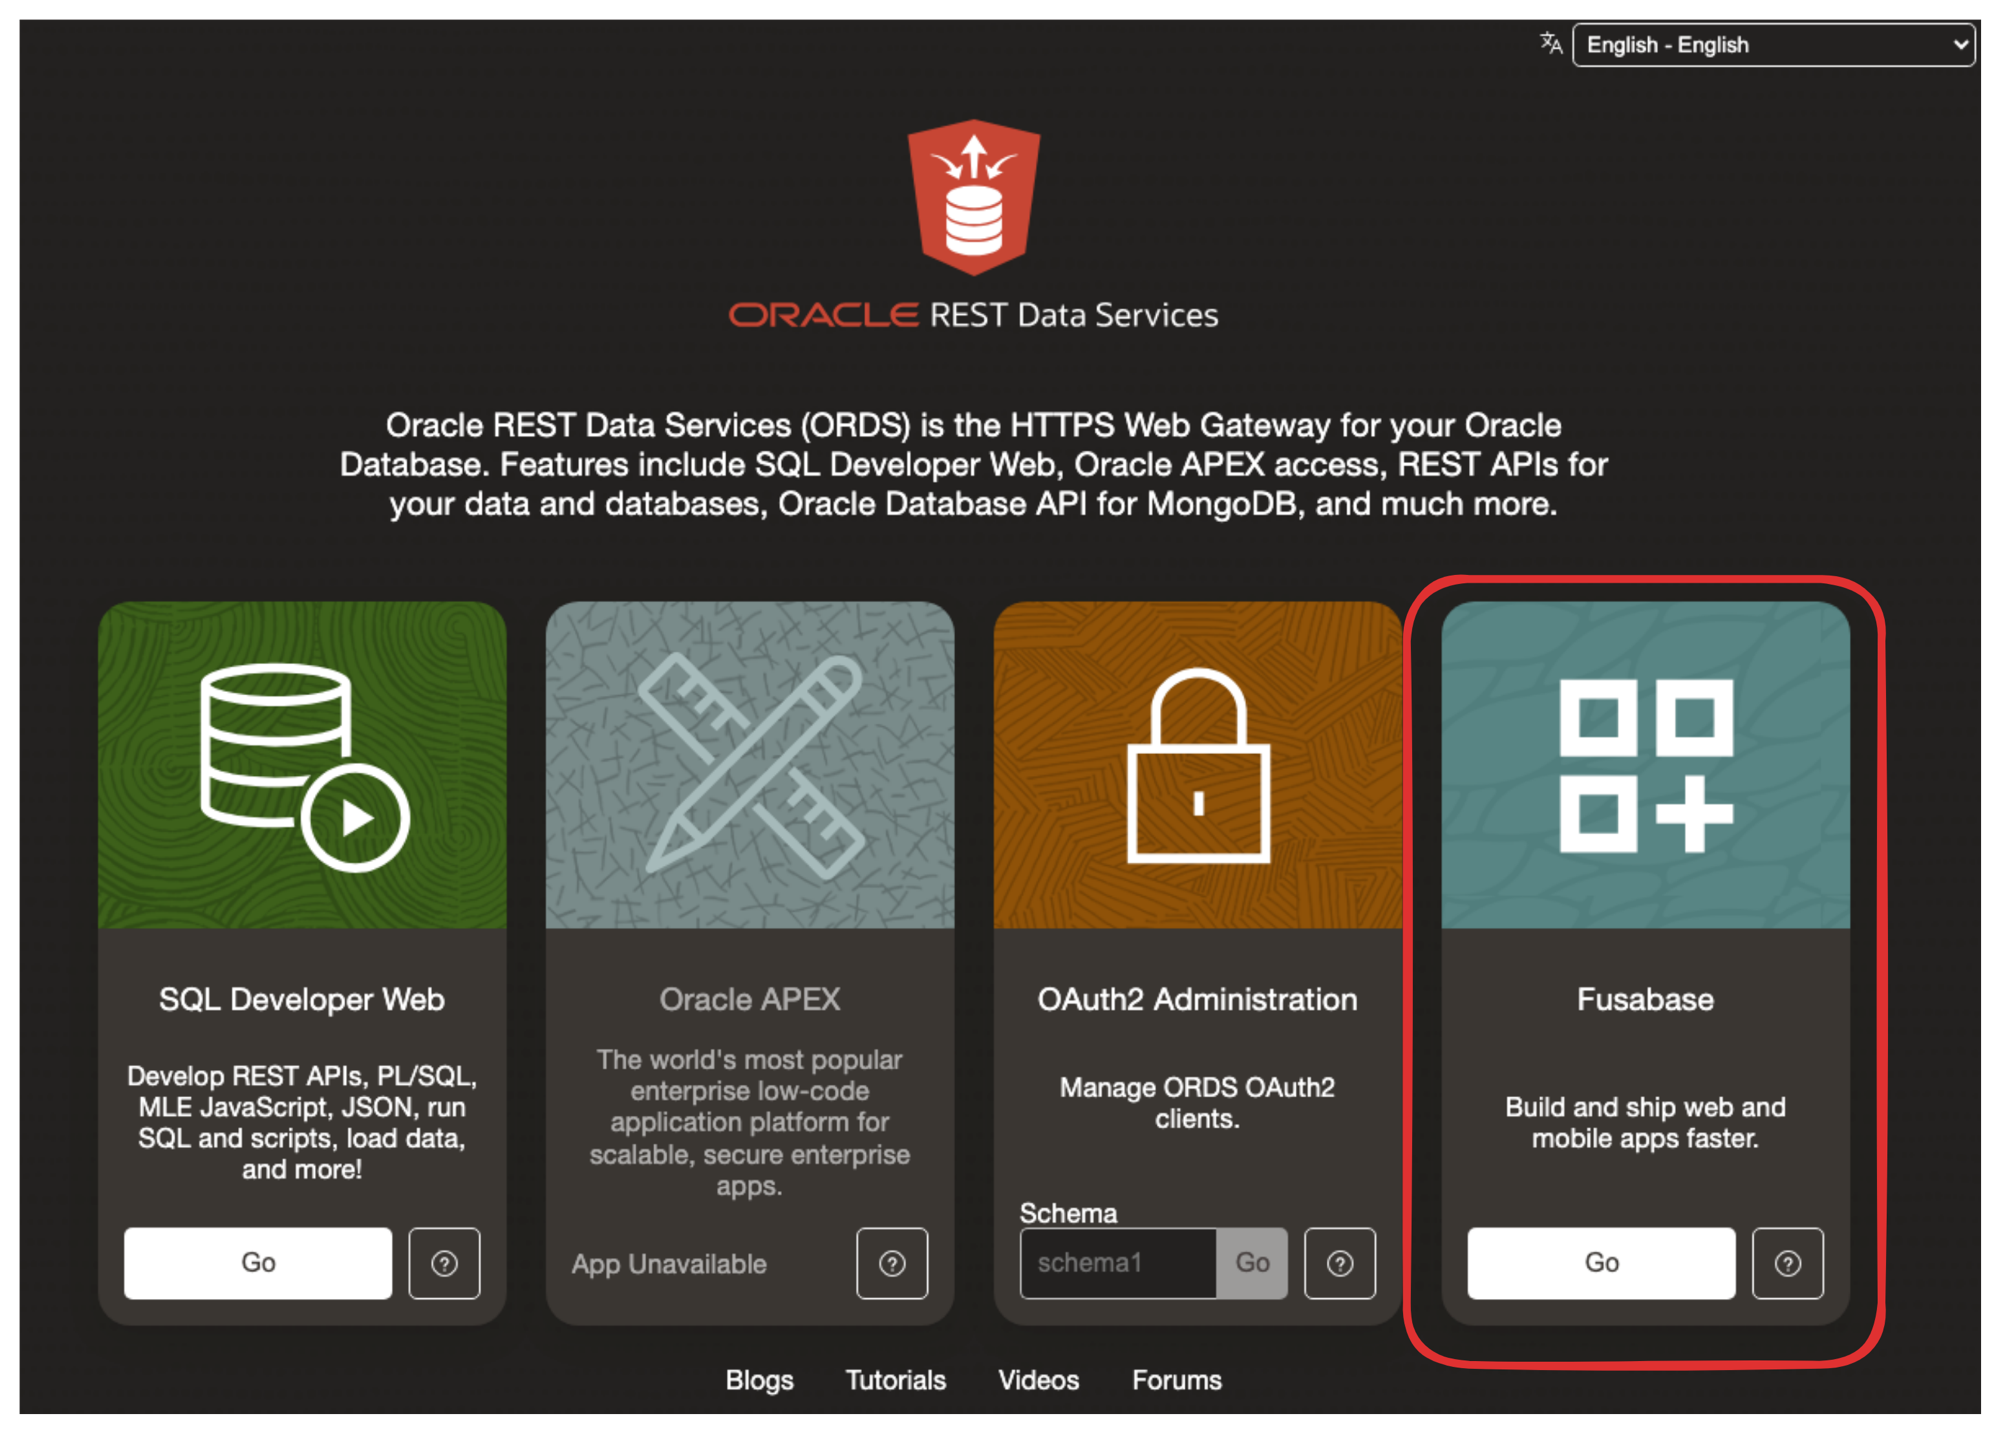
If you selected a custom certificate and hostname, use that hostname instead. If you selected the default OCI certificate, use the gateway hostname OCI provided.
When the landing page loads, the gateway is receiving the public HTTPS request and forwarding it to ORDS. You now have the gateway URL to use as the public entry point for your Fusabase app.
Troubleshooting
504 Gateway Timeout
A 504 means the gateway did not receive a timely response from the backend. Check:
- the
<ORDS_HOST>value in the backend URL; - the
<ORDS_PORT>value; - the gateway subnet route;
- the security list or network security group between the gateway and the ORDS host;
- the VM host firewall, if ORDS runs on a VM;
- the published port and network configuration, if ORDS runs in a container;
- the gateway and ORDS timeout values.
404 Not Found
Check the deployment path prefix and route:
Path prefix: /
Route: /ords/{path*}
Also make sure the client URL contains /ords/ exactly once. A path prefix of /ords combined with a route beginning with /ords would create /ords/ords/....
Redirects point to HTTP or the private ORDS host
Check the three forwarded headers:
X-Forwarded-Proto: https
X-Forwarded-Host: <GATEWAY_HOSTNAME>
Host: <GATEWAY_HOSTNAME>
The public HTTPS hostname needs to be the value used for both host headers.
The request works directly but not through the gateway
Compare the direct ORDS URL and the gateway URL carefully. The path, HTTP method, request body, and authentication headers should be the same. Then check the gateway execution logs for the request route and backend response.
Before using this in production
The basic route is now in place. Before sending production traffic, decide and test:
- a custom domain and matching TLS certificate;
- gateway authentication or an explicit decision to rely on Fusabase and ORDS authentication;
- rate limits for authentication, writes, uploads, and expensive queries;
- CORS for the actual browser application origin, if required;
- API logging and alerting;
- request size and timeout limits for your Fusabase services;
- a private gateway or restricted backend network path, if required;
- how direct public access to ORDS will be blocked, if needed.
The gateway does not replace Fusabase authentication, App Trust, Security Rules, or Oracle AI Database security. It controls the traffic entering the API. The existing application and database layers still decide who can access data and what they can do with it.
That's all
You now have an OCI API Gateway in front of an existing Fusabase environment.
Once the basic route is working, add the policies and production controls that fit your application.
Until next time,
-Killian